Welcome to our comprehensive guide on well pump wiring! Whether you’re a homeowner looking to troubleshoot issues with your well pump wiring or a professional in need of a refresher, we’ve got you covered. In this article, we will delve into the basics of well pump wiring, including the importance of correct wiring, common types of well pumps and their wiring needs, and step-by-step guides for wiring both two and three wire pumps.
But why is this well pump wiring diagram topic important? Well, did you know that incorrect wiring can not only lead to malfunctioning pumps but also pose significant safety risks? By understanding the ins and outs of well pump wiring diagram, you can ensure proper installation, maintenance, and troubleshooting.
So let’s dive in and demystify the world of well pump wiring diagram !
The Facts at a Glance
- It is important to have correct wiring for well pumps.
- Different types of well pumps have different wiring needs.
- The text provides step-by-step guides for wiring a two-wire pump and a three-wire pump, as well as troubleshooting tips.

1/16 The Importance of Correct Wiring
The safety and functionality of well pumps rely heavily on proper wiring. Incorrect wiring not only poses a risk to your well-being, but it can also cause significant harm to the pump system itself. The most critical danger that arises from incorrect wiring is the potential for electrical shock.
Faulty wiring can create a hazardous environment, especially when water is involved, heightening the chances of electrocution. Moreover, improper wiring can lead to damage within the pump system. If the wiring is installed incorrectly, it can result in malfunctions or even complete failure, leading to expensive repairs or the need for a replacement.
To ensure both safety and efficiency, it is crucial to adhere to proper wiring guidelines . These guidelines ensure secure electrical connections, the correct voltage usage, and promote the overall safe operation of the well pump system. By prioritizing safety and following correct wiring practices, you can minimize the risks associated with incorrect wiring and guarantee the longevity and reliability of your well pump system.
If you’re looking for guidance on how to wire a well pump, check out our article “Wiring a Well Pump” for step-by-step instructions and helpful tips.

2/16 Common Types of Well Pumps and Their Wiring Needs
Selecting the appropriate well pump is essential for optimal performance. Factors such as water depth, flow rate, and pressure requirements must be taken into consideration. Consulting with a professional well pump installer can help determine the perfect pump for your specific needs.
Different types of pumps have varying wiring needs. Submersible pumps are ideal for deep wells, as they are designed to operate underwater. These pumps require a specialized cable that can withstand being submerged.
On the other hand, jet pumps are better suited for shallow wells and are placed above ground. They utilize a standard electrical cable that connects to an above-ground power source. By understanding the considerations involved in choosing a well pump, the unique wiring requirements, and the significance of selecting the appropriate pump, you can ensure the efficient and reliable operation of your well system.
3/16 Identifying the Breaker Panel
In the realm of well pump wiring, locating the breaker panel within your humble abode is of utmost importance. This panel serves as the commanding hub for your electrical framework, encompassing the well pump. In your search, cast your eyes upon a metallic enclosure residing within the basement, garage, or utility room.
Within this sacred sanctuary, you shall find an array of switches and circuit breakers, each bearing labels indicative of distinct sectors of your dwelling. Once you uncover this treasure trove, you shall unlock the secrets of its purpose: safeguarding your well pump from harm and preventing electrical mishaps. By acquiring the knowledge to discern the breaker panel, you shall ensure the harmonious functioning of your well pump system, free from perils and tribulations.

A Step-by-Step Guide to Wiring Your Well Pump: Ensuring Safety and Efficiency
- Identify the breaker panel for your well pump wiring.
- Determine the number of wires in your well pump and understand their roles.
- Check for voltage in your well pump wires to ensure safety.
- Follow the step-by-step guide to wiring a two wire pump, using the necessary tools.
- Refer to the step-by-step guide to wiring a three wire pump, using the required tools.
4/16 Understanding the Role of the Breaker Panel in Well Pump Wiring
In the intricate web of well pump wiring, the breaker panel reigns supreme. With the power of a conductor, it holds the key to the pump’s existence, ensuring a seamless flow of electricity. Its duty extends beyond mere control, for it safeguards against the ominous specter of electrical mishaps.
To navigate this realm of wires and currents, homeowners must grasp its profound connection to the pump, for this knowledge is the compass that guides them towards safety and longevity.
If you’re looking for a detailed guide on how to wire a well pump pressure switch, check out this helpful article on well pump pressure switch wiring diagram .
5/16 How to Identify Different Wires
Properly installing and troubleshooting a well pump system requires a thorough understanding of its various wires. Each wire color serves a specific function, such as power supply, grounding, or control. For instance, black wires provide power supply, while green or bare copper wires handle grounding.
Other colors like red or yellow may be designated for control. To avoid confusion, it is advisable to use a wire tester to identify the purpose of each wire by detecting voltage or continuity. Additionally, labeling the wires with their specific functions can help prevent mistakes and save valuable time.
By familiarizing yourself with the system’s functionality and following these steps, you can ensure the safety and efficiency of your well pump system .
6/16 Understanding What Each Wire Does
The mastery of understanding the various wire colors in a well pump system is imperative for seamless functionality. By comprehending the role of each wire, you can efficiently troubleshoot and resolve any complications that may arise. Properly labeling the wires is a significant aspect to prevent confusion during installation or maintenance.
This labeling aids in identifying the wire responsible for a specific function. For instance, the red wire might power the pump motor, the yellow wire could be linked to the pressure switch, and the black wire may serve as the ground wire for system safety. Through this knowledge, you can take the necessary measures to ensure optimal performance and longevity of your esteemed well pump system.

Essential Steps for Proper Well Pump Wiring: A Comprehensive Guide
- Well pump wiring is crucial for the proper functioning of the pump, and incorrect wiring can lead to various issues such as pump failure or electrical hazards.
- There are different types of well pumps, including two-wire pumps and three-wire pumps, and each requires specific wiring configurations.
- The breaker panel is an important component in well pump wiring, as it controls the power supply to the pump.
- Identifying the breaker panel is essential before starting the wiring process, and it is usually located near the main electrical panel in the house.
- The number of wires in a well pump depends on the type of pump, with two-wire pumps typically having two wires and three-wire pumps having three wires.
- It is important to understand the purpose of each wire in the well pump, such as the power wire, ground wire, and control wire.
- Checking for voltage in the well pump wires is crucial to ensure that the pump is receiving the correct electrical supply, and it should be done safely using a multimeter or voltage tester.
7/16 The Importance of Checking for Voltage
Ensuring the absence of voltage is vital for the safety and functionality of well pump wiring. Neglecting this step can result in electrical hazards, fires, and other electrical complications. By consistently verifying the absence of voltage before handling the wiring, you can minimize accidents and establish a secure work environment.
Regular voltage checks are crucial for early detection and resolution of any issues, averting additional damage and safety concerns. Ultimately, prioritizing regular voltage checks is essential for preserving the integrity and safety of your well pump system.
If you’re looking to learn more about well pump pressure switch wiring, check out this informative article on how to properly wire a well pump pressure switch and ensure your system is functioning correctly.
8/16 How to Safely Check for Voltage
Ensuring safety is of utmost importance when checking the voltage in your well pump wiring. Here’s a step-by-step guide to help you conduct a safe and accurate voltage check. Begin by prioritizing proper grounding.
Use a voltage tester to check the wires for electrical current. Before proceeding with the voltage check, it’s crucial to disconnect the power supply. This precautionary measure will protect you from potential shocks and prevent any damage to the tester.
Remember to turn off the breaker or power source. Lastly, adhere to safety guidelines to minimize the risk of electrical accidents. Equip yourself with protective gear and clear the area surrounding the well pump of any water or moisture.
By utilizing a voltage tester, disconnecting the power, and following safety protocols, you can confidently check the voltage in your well pump wiring. Always prioritize safety when working with electricity, as it’s better to be safe than sorry.

9/16 Tools Needed for Wiring a Two Wire Pump
Before embarking on the endeavor of wiring a two wire pump, it is imperative to possess the appropriate arsenal of tools. The indispensables include a trusty screwdriver and wire strippers, which will facilitate the secure connection of the wires. Equally important is a voltage tester, as it ensures proper grounding and enables the verification of the power supply.
To ensure secure connections and provide an added layer of protection, pliers and electrical tape are also indispensable. Prior to commencing the wiring process, it is of utmost importance to ensure that these tools are readily available. Armed with the right tools, you shall be well-prepared to execute the installation of the pump with aplomb.
Types of Well Pumps and Their Wiring Needs – Tabelle
| Well Pump Type | Wiring Needs |
|---|---|
| Submersible Pump | – Required number of wires: Two (for single-phase) or three (for three-phase) – Voltage requirements: Typically 230V or 460V for residential use – Wire gauge size: Depends on the pump’s horsepower rating and the distance from the electrical panel |
| Jet Pump | – Required number of wires: Two (for single-phase) or three (for three-phase) – Voltage requirements: Typically 115V or 230V for residential use – Wire gauge size: Depends on the pump’s horsepower rating and the distance from the electrical panel |
| Centrifugal Pump | – Required number of wires: Two (for single-phase) or three (for three-phase) – Voltage requirements: Typically 115V or 230V for residential use – Wire gauge size: Depends on the pump’s horsepower rating and the distance from the electrical panel |
| Hand Pump | – Wiring considerations: No electrical wiring required as it operates manually |
10/16 Guide to Wiring a Two Wire Pump
In the intricate process of wiring a two wire pump , the utmost importance lies in securing every connection with precision. Employ the aid of pliers to tighten any loose ends and fortify them by encasing them in electrical tape. This simple act acts as a shield, thwarting potential issues that may arise from faulty or loose connections.
Another crucial step to undertake is testing for proper grounding. Before proceeding with the wiring, employ a voltage tester to confirm that the pump is grounded securely. Grounding serves as an indispensable safeguard, guaranteeing safe operation and preventing any unfortunate electrical accidents.
To assist you further, here is a concise step-by-step guide that elucidates the process of wiring a two wire pump :
1. Commence by disabling the power supply to the well pump at the breaker panel.
2. Employ wire strippers to deftly remove the outer insulation from the two wires connected to the pump.
3. Gradually strip approximately half an inch of insulation from the wire ends.
4. Proceed to connect the black wire from the pump to the black wire in the electrical box using wire connectors.
5. Similarly, connect the white wire from the pump to the white wire in the electrical box using wire connectors .
6. After making these connections, reinforce their stability by utilizing pliers and enveloping them in electrical tape for an additional layer of protection.
7. Employ a voltage tester to meticulously inspect the grounding for accuracy.
8. Once the grounding is confirmed, restore power to the well pump at the breaker panel. By adhering to these precise steps, you will successfully wire a two wire pump, ensuring a seamless and efficient operation. Always prioritize safety and do not hesitate to seek professional assistance if any uncertainties or discomfort arise during the process.

11/16 Tools Needed for Wiring a Three Wire Pump
Having the correct tools is absolutely essential when it comes to wiring a three wire pump. Wire connectors, wire nuts, and a wire stripper are all crucial components for creating secure and efficient connections. Wire connectors are of utmost importance as they serve the vital function of joining the pump and the electrical supply.
They play a crucial role in preventing loose or faulty connections, which could lead to potential hazards. Wire nuts are essential for protecting exposed wires, thereby maintaining the integrity of the electrical connection. By reducing the risk of accidents, they ensure the safety and reliability of the overall system.
A wire stripper is a tool that allows for precise cutting and stripping . This ensures that the wire is of the appropriate length for a secure connection . With the help of a wire stripper, you can achieve accurate and reliable results.
In conclusion, these tools are indispensable for a successful installation and the proper functioning of your well pump system.
By the way, if you need a helpful guide on wiring your 240 volt well pump, check out this informative article I found that breaks down the process step by step.

Did you know that the first recorded use of a pump to bring water up from a well dates back to ancient Egypt? The Egyptians used a device called a shadoof, which consisted of a long pole with a bucket on one end and a counterweight on the other. This early form of well pump made it easier for people to access water for drinking and irrigation.

12/16 Guide to Wiring a Three Wire Pump
When it comes to wiring a three-wire pump, there are a few key factors to consider for a reliable and efficient connection. The use of wire connectors is crucial in establishing a secure link between the pump and power source, preventing any loose connections or potential hazards that may arise from faulty wiring. To safeguard the exposed wires, the use of wire nuts is essential.
These nuts act as a protective barrier, shielding the wires from any external factors that could potentially cause damage. By ensuring a proper and secure attachment of the wires with wire nuts, you guarantee the longevity and safety of your pump system. For precise wire cutting and stripping, a wire stripper proves to be an invaluable tool.
It enables you to strip the wires to the desired length, facilitating a clean and accurate connection. By removing the insulation with a wire stripper, you expose the necessary parts required for a secure and dependable connection. By following these guidelines, you can confidently wire a three-wire pump, ensuring a safe and effective operation.
Remember to utilize wire connectors for secure connections, employ wire nuts to protect exposed wires, and make use of a wire stripper for precise wire cutting and stripping. Armed with these tools and techniques, you’ll be well-prepared to tackle the wiring process and enjoy the seamless functionality of your pump system.

13/16 Common Wiring Problems and Their Solutions
Troubleshooting Common Well Pump Wiring Issues When it comes to well pump wiring, there are a few issues that can arise. But fear not! With some basic knowledge and troubleshooting skills, you can easily identify and resolve these problems.
One common issue is faulty wire connections. Over time, wires can loosen or become damaged, affecting electrical conductivity. To fix this, carefully inspect all wire connections and ensure they are securely fastened.
Use pliers to tighten any loose wires and replace any damaged ones to prevent further complications. Another problem that may occur is voltage fluctuations. This can be caused by a faulty breaker panel or overload in the wiring.
To troubleshoot, check the voltage at the breaker panel. If it’s not within the desired range, consider replacing the panel or consulting a professional electrician. Lastly, inadequate power supply can be a common wiring problem.
If the well pump isn’t receiving enough power, it won’t function properly. To resolve this, check the circuit breaker dedicated to the well pump and ensure it is switched on. If the breaker keeps tripping, it could indicate a more serious electrical issue, so it’s best to seek professional assistance.
By identifying and resolving these common wiring problems, you can ensure your well pump system operates smoothly and efficiently. Remember, if you’re uncertain about any electrical work, it’s always safer to consult a professional. Stay safe and happy pumping!
14/16 When to Call a Professional
When your well pump starts acting up, it’s crucial to seek the assistance of a professional. Signs such as reduced water pressure or unusual sounds may indicate internal damage or a failing pump. Dealing with electrical issues related to the well pump requires the expertise of professionals, as working with electricity can pose serious risks.
Attempting to fix wiring problems without proper training can potentially worsen the situation or lead to accidents . While DIY troubleshooting can be beneficial, there are instances where it’s wiser to call in a professional . They have the knowledge to assess the situation, provide expert guidance, and carry out the necessary repairs or replacements.
Always prioritize safety when it comes to your well pump. Reaching out to a professional will not only save you time but also prevent further damage. Don’t hesitate to seek help when needed.

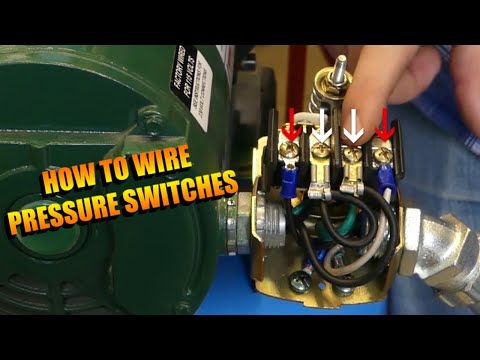
Looking to wire a pressure switch for your well pump? Check out this informative video on how to wire a pressure switch effectively.
15/16 Questions to Ask Your Professional
Embarking on the journey of maintaining and troubleshooting your well pump system requires more than just knowledge and questions. It demands the right knowledge and the right questions. Let’s delve into the crucial inquiries that will guide you through this endeavor:
1. How can we master the art of maintaining and troubleshooting our well pump system? Grasping the fundamentals of maintenance and troubleshooting will empower you to pinpoint and resolve any issues that may arise.
Regular cleaning, leak detection, and ensuring proper electrical connections are key practices to adopt.
2. Why should we prioritize regular inspections and maintenance for our well pump? These routine check-ups and upkeep sessions act as guardians, shielding your well pump system from escalating problems. By functioning efficiently and effectively, your well pump system becomes a beacon of savings, both in terms of time and money.
3. What options do we have in terms of warranty and service for our well pump? Equipping yourself with knowledge about warranty coverage and available service options is pivotal. This insight will determine the extent of assistance you can expect for repairs or replacements.
Additionally, exploring additional service packages will help you maintain your well pump system’s peak performance. Asking these pivotal questions will unlock the gateway to understanding the art of maintaining and troubleshooting your well pump system. Armed with this knowledge, you can ensure the longevity and efficiency of your well pump, sparing yourself from future headaches and expenses.

16/16 Understanding Quotes and Pricing
Finding the right well pump wiring services involves more than just price. It’s important to explore different quotes and understand how pricing is determined. Don’t forget to consider the reputation and experience of service providers as well.
By taking all these factors into account, you’ll ensure the best value and quality for your well pump system installation.
CONCLUSION
In conclusion, understanding the basics of well pump wiring is essential for ensuring the proper functioning and safety of your well pump system. By correctly wiring your well pump, you can avoid common issues and troubleshoot any problems that may arise. This article has provided a comprehensive guide to help you navigate the process, from identifying the breaker panel to checking for voltage and wiring a two or three-wire pump.
By following these steps and guidelines, you can confidently tackle well pump wiring projects. However, if you encounter any challenges or feel unsure, it is always recommended to consult a professional to ensure the job is done correctly. We hope this article has been a valuable resource for you in your well pump wiring endeavors.
If you found this information helpful, we encourage you to explore our other articles on related topics for further knowledge and insights.
FAQ
What are the 3 wires on a well pump?
In a 3-wire well pump setup, the motor is connected using specific colored wires (black, red, yellow) along with a green wire for grounding. Additionally, three-wire pumps require a separate control box, typically mounted on a nearby wall above the ground. This control box contains essential starting components for the pump’s operation.
How is a well pump connected?
When installing a well system, it is necessary to connect the well to your home or structure using piping. This piping will allow the water to be transported from the well to where it will be used. To ensure a secure connection between the piping and the well pump, crimp connectors are commonly used. These connectors provide a reliable and tight seal, preventing any leaks or disruptions in the water flow.
What are the 2 wires in a well pump?
The diagrams for 2-wire well pumps are easier to understand and simpler to wire. In these diagrams, you just need to connect the black wires to the other black wires, and the green wire (which is the ground wire) should be connected to the ground. By following these connections, you can ensure a proper and efficient wiring setup for your well pump.
What wire do I use for a well pump?
When it comes to residential water well work, the pump cable typically falls within the #6 to #14 AWG range. This range refers to the American Wire Gauge (AWG) measurement system, which determines the diameter of the cable. In simpler terms, the pump cable used for residential water wells tends to be of various sizes within this specific range.