Are you in the process of installing a toilet flange on a concrete floor ? If so, you’ve come to the right place. In this article, we will guide you through the step-by-step process of installing a toilet flange on a concrete floor, as well as provide expert tips for maintaining your toilet flange to concrete.
Whether you’re a DIY enthusiast or a homeowner looking to tackle a home improvement project, this article will provide you with the necessary information to successfully install a toilet flange on a concrete floor. So let’s dive in and explore the world of toilet flanges and how they can be securely installed on concrete surfaces.
The most important facts in a nutshell
- The importance of toilet flanges and how to choose the right one for your bathroom.
- A step-by-step guide on installing a toilet flange on a concrete floor.
- Common problems and solutions when installing a toilet flange on a concrete floor, along with expert tips for maintenance.

What is a Toilet Flange?
The toilet flange, an unsung hero of the bathroom, holds within it the power to connect, stabilize, and protect. Like a conductor leading an orchestra, it harmonizes the toilet bowl with the mighty sewer pipe, ensuring a symphony of functionality. But not all flanges are created equal.
In the realm of flange materials, the choices are vast and varied. PVC, known for its durability and affordability, stands as a steadfast option. Cast iron, a titan of strength and longevity, boasts unwavering resilience.
And then there’s stainless steel, a shining knight in armor, warding off the corrosive forces of time. When selecting a flange, one must consider the individual needs of their sacred sanctuary. Is it a bustling family bathroom, in need of a sturdy and budget-friendly PVC flange ?
Or perhaps a regal master bathroom, demanding the fortitude of a cast iron flange? Maybe it’s a modern oasis, where the corrosion-resistant charm of stainless steel reigns supreme. Whatever the choice, the importance of a well-matched flange cannot be understated.
It is the guardian of a seamless installation, the protector against leaks and the bane of costly repairs. So, dear reader, choose wisely and let your flange be the unsung hero it was meant to be.
If you’re wondering how to install a toilet flange on concrete, check out our informative guide here for step-by-step instructions and helpful tips.
Why is the Toilet Flange Important?
The toilet flange may not be the first thing that comes to mind when you think about your bathroom, but it is an essential component that deserves your attention. This small yet mighty piece of hardware serves a critical purpose in keeping your toilet in place and preventing any unwanted leaks. Without a properly functioning flange, you could be facing unpleasant odors, unsightly puddles, and even potential health risks.
By taking the time to ensure your flange is installed correctly and well-maintained, you can save yourself from unnecessary expenses and have the peace of mind that your toilet is secure and leak-free.
Different Types of Toilet Flange
When it comes to selecting a toilet flange for your bathroom, you have a variety of options to explore. Each type of flange offers its own unique advantages , ensuring that you find the perfect fit for your needs. One option to consider is the PVC flange .
Not only is it affordable, but it also boasts impressive resistance to both corrosion and chemical damage. This durability ensures that your flange will stand the test of time. Another option is the cast iron flange, renowned for its strength and stability.
Able to bear heavy loads without faltering, this flange guarantees that your toilet will remain securely in place. Lastly, the stainless steel flange provides exceptional durability and resistance to rust and corrosion. This makes it an ideal choice for bathrooms with high levels of moisture.
As you make your decision, be sure to take into account factors such as the size of the drain pipe and the dimensions of your toilet bowl. By selecting the right flange, you can enjoy a secure and leak-free toilet installation that will last for years to come.

Choosing the Correct Size Flange
Selecting the Perfect Flange for Your Toilet Installation When it comes to installing a toilet flange on a concrete floor, the size you choose is of utmost importance. To achieve a flawless installation, there are a few crucial factors that must be taken into consideration: Begin by measuring the diameter of the drain pipe. This step is essential in order to ensure a snug fit and to prevent any potential leaks or water damage.
Next, take into account the thickness of the concrete floor. It is imperative that the flange is compatible with the floor’s thickness, as this will guarantee a proper fit and unparalleled stability. Lastly, pay close attention to the dimensions of the toilet bowl.
It is imperative that the flange matches the bowl’s dimensions precisely. This will not only ensure proper alignment, but also a secure attachment . By carefully considering these factors, you will be able to select the ideal flange size for your toilet installation on a concrete floor.
This thoughtful approach will prevent any future issues and guarantee a flawlessly leak-free installation.
Did you know that the toilet flange, also known as a closet flange, is the crucial connection between your toilet bowl and the waste pipe in your bathroom?

Step #1: Gather Necessary Materials
To achieve a seamless and triumphant toilet flange installation on a concrete floor, meticulous preparation is crucial. Before embarking on this endeavor, it is imperative to procure the following indispensable tools:
1. Screwdriver: This versatile tool serves the purpose of removing the antiquated flange and securing the pristine replacement.
2. Hammer : With its innate ability to effectuate minor adjustments and gentle taps, the hammer proves to be an invaluable asset during the installation process.
3. Measuring Tape: The veracity of measurements is of utmost importance to ascertain the correct size and alignment of the flange.
4. Cleaning Solution: Prior to the installation of the new flange, it is imperative to meticulously cleanse the vicinity surrounding the drain.
5. Wax Ring: The inclusion of this essential component ensures the creation of a watertight seal between the flange and the toilet bowl.
6. Level: To guarantee the proper alignment and levelness with the floor, the indispensable presence of a level is indispensable.
7. Drill: Employing an appropriate drill bit, perforating the concrete to facilitate the securement of the flange is an indispensable step.
8. Screws: Employing high-quality concrete screws is essential to firmly fasten the flange. By conscientiously gathering these tools in advance, one can seamlessly navigate through the forthcoming steps with aplomb and poise.
If you’re curious about the different dimensions of toilet flanges, check out our article on toilet flange dimensions for all the information you need to know.

Step #2: Prepare the Installation Site
Prepare the site before installing your toilet flange on a concrete floor . Here’s what you need to do :
1. Remove any debris around the flange, such as dirt or construction materials. A clean workspace will make installation easier and protect against damage.
2. Check that the concrete floor is level and smooth. This will provide a stable foundation and prevent any wobbling. Use a level and make adjustments if necessary.
3. Clean the floor thoroughly with a cleaning solution to eliminate dirt, stains, or residue. A clean surface is essential for a proper seal and to prevent future leaks or water damage. By following these steps and ensuring cleanliness and levelness, you’ll achieve a successful toilet flange installation.
Before embarking on the installation of a new toilet flange , the first order of business is bidding farewell to the old one. This essential step sets the stage for a pristine and secure installation. Say goodbye to the old flange by employing trusty tools like a wrench or pliers to loosen and detach the bolts that hold the toilet bowl in place.
You might also require the assistance of a screwdriver or pry bar to free the flange from its steadfast connection to the floor. Removing the old flange is not a mere formality. It is an opportunity to assess its condition and ascertain whether it is damaged or worn-out.
Such deficiencies can result in pesky leaks and unsettling instability. By replacing the old flange, you not only prevent further harm but also guarantee a perfect fit for the new toilet. Nonetheless, removing the old flange is not without its challenges.
Encountering corroded bolts or a flange stubbornly adhered to the floor may demand extra effort on your part. In these moments, remember that patience and persistence are the keys to successfully bidding farewell to the old flange. Devote ample time to the proper removal of the old flange, as this paves the way for a seamless and triumphant installation of its successor.
Equip yourself with the right tools, brace yourself for potential obstacles, and execute the task with utmost precision.

Step #4: Clean the Area around the Drain
Before embarking on the task of installing the toilet flange, it is imperative to meticulously cleanse the vicinity surrounding the drain. Employ a brush to eliminate any debris, filth, or remnants that may have accumulated. Subsequently, sanitize the region by wiping it with a suitable cleaning solution.
It is of utmost importance to inspect the drain for any potential obstructions utilizing a flashlight. This meticulous step is pivotal in guaranteeing the seamless functioning of the toilet, devoid of any obstacles. Dedicate ample time to this cleansing process to avert future predicaments and to guarantee a steadfast, impervious installation.
If you’re looking for the best toilet flange for concrete floors, check out our article on “Choosing the Right Toilet Flange for Concrete” to find the perfect solution for your bathroom.
Everything You Need to Know about Installing a Toilet Flange on a Concrete Floor
- A toilet flange is a plumbing component that connects the toilet bowl to the floor and the sewer line.
- The toilet flange is important because it provides a secure and watertight connection between the toilet and the sewer line, preventing leaks and odors from escaping.
- There are different types of toilet flanges available, including PVC, cast iron, and stainless steel, each with its own advantages and disadvantages.
- Choosing the correct size flange is crucial to ensure a proper fit and seal between the toilet bowl and the flange.
- Installing a toilet flange on a concrete floor requires several steps, including gathering necessary materials, removing the old flange, cleaning the area around the drain, positioning and securing the new flange, installing a wax ring, and reconnecting the water supply.
Step #5: Measure the Size of the Flange
Prepare yourself for a seamless and trouble-free installation by taking out your measuring tape. Ensuring a secure connection between the toilet bowl and the sewer pipe, accurately measuring the size of the toilet flange on a concrete floor is crucial. By considering the depth of the floor and providing ample clearance, you guarantee a leak-free and stable installation.
Don’t overlook this essential step, as it will prevent future issues and guarantee a successful outcome.
Step #6: Position the New Flange
Achieving a flawless installation of a new toilet flange hinges upon one crucial element: proper alignment. This fundamental task cannot be overlooked, for it holds the key to a leak-free future. Align the flange diligently, ensuring it rests directly upon the drain pipe, and center it meticulously over the toilet bowl.
Remember, a stable foundation is imperative, so take the time to ascertain that the flange is perfectly level in every direction. Once this vital step is completed, secure the flange firmly in place, laying the groundwork for a robust and enduring union with the toilet bowl. With these essential measures in mind, you can embark upon your new flange installation journey with confidence, knowing that you have set the stage for a triumph of plumbing prowess.
Step #7: Drill Holes for the Screws
In the realm of toilet installations, there exists a crucial task that requires utmost precision and care. To fasten the toilet flange securely onto the unforgiving concrete floor, artistry is required. One must embark on a voyage of measuring and marking, ensuring that the holes are placed with symmetrical accuracy, aligned perfectly with the majestic flange.
In this delicate dance of craftsmanship, the choice of weaponry is paramount. A drill bit, specially crafted for the unforgiving nature of concrete, must be wielded with grace and finesse. This formidable tool effortlessly pierces through the unyielding surface, creating holes that are exquisitely tailored to accommodate the screws.
Now, as the stage is set and the holes are carved into the floor, a moment of truth approaches. The flange, a symbol of stability and functionality, yearns to be embraced by the concrete floor. With screws of fortitude, carefully chosen for their affinity to concrete, the flange is secured to its rightful throne.
But the task is not without its challenges. As the screws find their home, the delicate balance of pressure must be maintained, lest the floor cracks under the weight of this noble union. And so, dear reader, with these steps diligently followed and the tools of the trade employed with precision, the toilet flange shall stand strong and unwavering.
The marriage of concrete and flange shall endure the test of time, ensuring a sanctuary of hygiene and tranquility for generations to come.

Different Flange Installation Methods: A Comparative Table
| Flange Installation Method | Description | Advantages | Disadvantages |
|---|---|---|---|
| Direct Mounting | Involves securing the flange directly onto the concrete floor using screws or bolts. | – Simple and straightforward installation process. | – Requires drilling into the concrete, which may cause damage. – Limited adjustment options. |
| Flange Spacer Kit | Utilizes a spacer kit to elevate the flange above the concrete surface, allowing for a secure installation. | – Provides a level and stable flange platform. – Offers flexibility in adjusting the flange height. |
– Requires additional components and assembly time. – May increase the overall height of the toilet. |
| Repair Flange | A repair flange is used when the existing flange is damaged or broken. It is secured to the concrete floor using screws or bolts. | – Fixes the problem of a damaged flange without major floor modifications. – Provides a stable base for toilet installation. |
– May require removing the existing flange, which can be time-consuming. – Limited adjustability. |
| Expansion Anchors | Involves using expansion anchors to secure the flange onto the concrete floor, providing a stable and secure installation. | – Offers a strong and reliable connection to the concrete surface. – Adjustable for different flange heights. |
– Requires drilling into the concrete, which may cause damage. – Requires proper alignment for optimal performance. |
| Epoxy Adhesive | Utilizes epoxy adhesive to bond the flange to the concrete floor, ensuring a strong and permanent attachment. | – Provides a strong and durable bond between the flange and concrete. – Can be used in situations where drilling is not possible. – Allows for adjustment during the curing process. |
– Requires proper surface preparation for optimal adhesion. – Not easily reversible or adjustable once cured. |
Step #8: Secure the Flange to the Concrete Floor
To ensure a tight and leak-proof connection, it is crucial to properly secure the toilet flange to the concrete floor during installation. Begin by aligning the flange with the drain pipe, guaranteeing a seamless connection that will prevent any unwanted leaks. This alignment is also vital for the stability of the toilet bowl atop the flange.
To securely attach the flange to the floor, opt for top-quality screws specifically designed for concrete. These screws possess the necessary strength and stability to withstand the test of time. When fastening the flange, remember to apply even pressure, as any excessive force may lead to cracks or damage to the concrete.
Gradually and evenly tighten the screws to ensure a secure fit. By diligently following these steps, you will achieve a steadfast and long-lasting flange installation, an absolute necessity for the optimal functionality and prolonged lifespan of your toilet.
Step #9: Install the Wax Ring on the Flange
Ensuring a watertight seal, the correct installation of the wax ring on the flange is essential. Avoiding leaks requires precise alignment and even pressure. Taking the time for proper placement will prevent future plumbing issues, guaranteeing a secure and leak-free toilet installation.
Step #10: Reinstall the Toilet Bowl
Returning the Throne: A Seamless Reinstallation Having successfully conquered the task of installing the new toilet flange onto your solid concrete floor, it is now time to bring back the illustrious star of the show – the toilet bowl itself. Fear not, as I shall guide you through the process of achieving a flawless fit, ensuring a leak-free sanctuary. Step One: The Art of Alignment As with any grand endeavor, proper alignment is the key to success.
Position the toilet bowl with precision, ensuring it rests harmoniously over the flange. Align the bolt holes of the throne with the openings on the flange, creating a seamless connection that will withstand the test of time. Step Two: The Symphony of Tightening With a steady hand and an unwavering determination, gently tighten the bolts by hand, alternating between them.
This delicate dance of balance is essential to maintain the equilibrium of your majestic creation. Once satisfied, utilize a wrench to further secure the bolts, taking care not to exert excessive force that may lead to unwanted damage. Step Three: The Watchful Eye Having triumphed over the installation process, it is now time to be vigilant.
Flush the throne, and with a discerning eye, inspect the area surrounding the flange for any signs of water seepage. Should any leaks dare to emerge, address them promptly, for even the smallest drip has the potential to wreak havoc if left unattended. Take pride in your accomplishment, as you have now seamlessly reinstalled the toilet bowl.
With confidence in your craftsmanship , proceed to reconnect the water supply, and bask in the glory of your newly adorned throne. May your days be filled with blissful, leak-free moments of serenity.

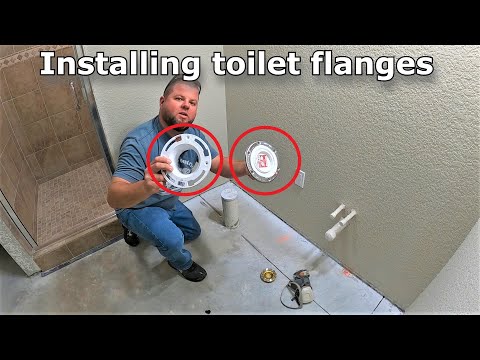
Are you looking to install a toilet flange on concrete? In this video, we will guide you through the process step-by-step. Stay tuned to learn how to properly secure the flange and finish up your bathroom flooring. #DIY #bathroomrenovation
Step #11: Reconnect the Water Supply
Step #11: Ensuring a Watertight Connection With the toilet flange securely installed, it’s time to reconnect the water supply and ensure a flawless operation. Preventing leaks and water damage is crucial, so let’s dive in. Begin by meticulously tightening the water supply connections using the appropriate tools and techniques.
This will guarantee a secure seal, warding off any unwanted water leakage. Once the connections are tightened, carefully inspect the surrounding areas for any signs of water seepage or drips. Should you discover any leaks, address them promptly by either tightening the connections further or utilizing plumbing tape for a more effective seal.
Once leaks have been resolved, turn on the water supply and put the flush and drainage mechanisms to the test. Confirm that everything is in perfect working order, functioning as it should. Lastly, ensure the stability and snug fit of the toilet bowl.
Give it a gentle shake to ensure it remains steadfast and free of wobbles. If all is well and the water supply operates flawlessly, congratulations! You’ve not only reconnected the water supply but also successfully completed the installation of your toilet flange.
Step #12: Test the Installation
With the toilet flange firmly in place on the concrete floor, it is crucial to ensure its flawless operation. Begin by meticulously inspecting the area surrounding the flange, searching for any signs of leaks or water seeping through. This meticulous examination is of utmost importance, as it serves as a safeguard against potential water damage and the subsequent exorbitant repairs that may ensue.
Moving forward, it is imperative to put the flush and drainage mechanisms of the toilet to the test. The water should flow effortlessly and efficiently, devoid of any obstructions or sluggishness. This meticulous examination will guarantee that your toilet is in perfect working order, effectively thwarting any potential plumbing predicaments that may arise.
Lastly, it is of utmost importance to evaluate the stability of the toilet bowl. Take a seat upon it and assess whether it wobbles or shifts. The stability of the toilet bowl is undeniably paramount, as it directly impacts both comfort and safety.
Should you detect any instability , it is advised to meticulously tighten the bolts evenly , thus firmly securing the toilet bowl in its rightful place. By diligently adhering to these steps and conducting a thorough examination of the installation, you will be bestowed with an unwavering sense of tranquility, knowing that your toilet flange is impeccably installed and flawlessly operational.

Problem #1: Cracked or Damaged Flange
A damaged flange is a frequent problem encountered during toilet installations. Poor installation techniques or excessive pressure can lead to flange cracks. Indications of a cracked flange include water leakage near the toilet base and an unstable toilet bowl.
To rectify the issue, the toilet bowl must be taken out, and the damaged portions of the flange repaired or substituted. The flange is then firmly reattached to the floor, and the toilet bowl is reinstalled. By implementing the correct repairs, a cracked flange can be effectively resolved, resulting in a secure and leak-free toilet installation.
How to Install a Toilet Flange on Concrete: A Step-by-Step Guide
- Gather necessary materials
- Prepare the installation site
- Remove the old flange
- Clean the area around the drain
- Measure the size of the flange
- Position the new flange
- Drill holes for the screws
Problem #2: Difficulty Drilling into Concrete
Conquering the formidable task of installing a toilet flange on a concrete floor can be a daunting endeavor. However, fear not, for there exist ingenious solutions that can alleviate your burden. Among these, the mighty hammer drill reigns supreme, its power capable of shattering even the most unyielding concrete.
Should you find yourself lacking this formidable tool, do not hesitate to invest in its indispensable prowess. Before embarking on the drilling journey, it is wise to pre-drill pilot holes, thereby safeguarding the concrete from untimely cracks. Additionally, the wondrous aid of lubricating the drill bit with either water or oil shall grant you the gift of frictionless drilling.
Remember these invaluable tips: wield the hammer drill, embark upon the path of pre-drilling pilot holes, and embrace the lubrication of the drill bit. Armed with these formidable solutions, you shall conquer any concrete drilling challenge that dares to cross your path.
Problem #3: Inadequate Seal
In the intricate world of bathrooms, a faulty seal in a toilet flange can wreak havoc, leading to leaks and potential water damage. To maintain the sanctity of your porcelain throne, it is imperative to delve into the causes, signs, and remedies for this troublesome issue. The culprits behind an inadequate seal in a toilet flange are not to be underestimated.
One of the main suspects is a worn-out wax ring, which fails to create the watertight seal it once did. Another possible offender is a flange that has been improperly installed or damaged, leaving unsightly gaps between the toilet bowl and the flange. Recognizing the telltale signs of a faulty seal is paramount in your quest for a well-functioning bathroom.
Keep a keen eye out for water leakage around the base of the toilet, an unpleasant odor permeating the air, or the disconcerting sight of your toilet bowl wobbling or shifting during use. Thankfully, a glimmer of hope shines upon the troubled world of faulty seals. Begin your quest for restoration by replacing the worn-out wax ring, ensuring a robust and secure seal between the toilet bowl and the flange.
Additionally, inspect the flange itself, and if necessary, repair or replace it. If you find yourself navigating uncharted waters, it is wise to seek the guidance of a professional. By addressing the causes, recognizing the signs, and implementing the appropriate solutions, you can triumph over the perils of a faulty seal, basking in the glory of a leak-free and fully operational bathroom.
Do not allow a minuscule seal problem to escalate into a monstrous headache – take action, restore order, and revel in the bliss of a functional bathroom.

1/2 Expert Tips for Maintaining Your Toilet Flange
The care and maintenance of your toilet flange are of utmost importance to its longevity and optimal performance. Expert advice can guide you in preserving the integrity of your flange. Vigilantly inspect your flange for any signs of wear and tear, such as cracks, chips, or corrosion, as these can compromise its functionality.
Swiftly addressing any issues that arise will prevent further damage or leaks. Regularly cleaning the flange and its surroundings is essential in preventing the accumulation of dirt, grime, and unpleasant odors. Utilize a gentle cleaning solution and brush to ensure a clean surface and a secure seal between the toilet and the flange, promoting hygiene.
Consider employing a waterproof sealant to safeguard your flange from moisture damage. This will effectively prevent water from seeping in and causing deterioration or rust. Ensure that the sealant you choose is compatible with your flange material and adhere to the manufacturer’s instructions.
By adhering to these maintenance practices of inspection, cleaning, and utilizing a waterproof sealant, you can significantly extend the lifespan of your toilet flange while minimizing the risk of leaks or other complications. These straightforward steps will ensure the proper functioning of your toilet and save you from costly repairs in the future.
2/2 CONCLUSION
In conclusion, understanding how to install a toilet flange on a concrete floor is essential for any homeowner or DIY enthusiast. By following the step-by-step guide provided in this article, you can ensure a proper and secure installation that will prevent leaks and other common problems. The different types of toilet flanges and the importance of choosing the correct size have been thoroughly explained, giving you the knowledge to make an informed decision for your bathroom.
Additionally, the article addresses common problems that may arise during the installation process and provides practical solutions. By following the expert tips for maintaining your toilet flange, you can prolong its lifespan and avoid future issues. Overall, this article serves as a comprehensive resource for those looking to install a toilet flange on a concrete floor, providing valuable information and guidance.
For more helpful articles on plumbing and home improvement topics, we recommend exploring our other resources to further enhance your knowledge and skills.
FAQ
Should toilet flange be screwed to concrete floor?
After positioning the flange, it is necessary to create holes in the concrete for the screws. To accomplish this, a concrete drill bit slightly smaller than the screws should be utilized. The quantity of screws required will vary depending on the size of the flange. Typically, four screws are needed to secure most flanges.
Does toilet flange sit on concrete or tile?
When renovating a bathroom, it is important to remove the toilet in order to properly install tiles on the new bathroom floor. This means that the toilet should be taken out before laying the tiles, and then the toilet flange can be placed on top once the tiles are installed. By following this process, you can ensure a seamless and professional-looking bathroom floor.
How high above concrete should toilet flange be?
The ideal flange height to aim for is approximately 1/4 inch above the finished floor. This height provides flexibility in using different types of wax rings while maintaining a secure seal. However, if you have recently installed new tiles or changed the bathroom flooring, it is possible that the flange height is not at its optimal level.