Are you planning to install a toilet flange on concrete ? If so, you’ve come to the right place. In this article, we will guide you through the step-by-step process of installing a toilet flange on concrete, ensuring a secure and reliable connection .
Whether you’re a DIY enthusiast or a homeowner looking to tackle a plumbing project, understanding how to properly install a toilet flange on concrete is crucial. By following our instructions and safety precautions, you’ll be able to successfully complete the installation of a toilet flange on concrete and avoid any potential challenges. So let’s get started and explore the world of toilet flanges on concrete!
In three sentences: The essentials in a nutshell
- This text provides information on what a toilet flange is and why it is important, as well as safety precautions before installation.
- It outlines the required tools and materials for installing a toilet flange on concrete and provides a step-by-step guide for the installation process.
- The text also mentions common challenges that may arise during the installation and when it is best to call a professional for assistance.

1/5 What is a Toilet Flange and Why It is Important
In the intricate world of toilets, one unsung hero stands tall – the toilet flange. This unassuming component is the key to keeping your toilet functioning flawlessly and your bathroom pristine. With various types available, such as the wax ring flange for residential toilets or the offset flange for those pesky misaligned waste pipes, the flange acts as the vital connection between your toilet and the waste pipe.
It ensures stability, fending off any unwelcome leaks or odors. To safeguard against any mishaps, it is crucial to install the flange securely, protecting it from any unfortunate movements or damage. By delving into the realm of flanges, understanding their diverse roles and the significance of proper installation, you can bask in the pleasure of a fully functional and leak-free toilet.
Warning
When installing a toilet flange on concrete , it is essential to prioritize personal safety. Always wear protective gear and equipment to ensure your well-being. Concrete work comes with its own set of risks, so it is crucial to be aware of them.
Minimize your exposure to harmful concrete dust by ensuring proper ventilation. Additionally, use sturdy and stable equipment when working at heights on ladders or scaffolding to prevent accidents. When working with power tools, exercise caution to avoid potential electrical hazards.
Follow safety procedures and guidelines when operating these tools. To further prevent accidents during installation, make sure to follow safety guidelines. Wear gloves and goggles to protect yourself from concrete and tool-related injuries.
By taking these precautions, you can safely and successfully install a toilet flange on concrete. Always remember to prioritize your personal safety when working with hazardous materials and equipment.

Safety Considerations
Safety should always be the top priority when installing a toilet flange on a concrete floor. Here are a few important safety tips to keep in mind:
1. Make sure to ventilate the area or wear a dust mask to protect yourself from inhaling harmful concrete dust that can affect your respiratory system.
2. Use a sturdy ladder or scaffolding to prevent any falls. It is crucial to ensure that the platform you stand on is stable and secure.
3. Be cautious of electrical hazards when using power tools. Always turn off the power supply and use insulated tools to minimize the risk of electrical shock. By following these safety tips, you can create a safer working environment when installing a toilet flange on concrete.
Remember, prioritizing safety is essential to prevent accidents and injuries.

Equipment / Tools
To successfully install a toilet flange on concrete, you’ll need a few essential tools. Here’s what you’ll require:
1. A hammer drill : This mighty tool will assist in creating the required holes in the concrete, allowing for a secure installation.
2. Concrete screws: These specialized screws are designed to firmly fasten the toilet flange to the concrete surface, ensuring stability.
3. An adjustable wrench: This versatile tool will enable you to connect the water supply line to the toilet flange, guaranteeing a leak-free installation. By having these tools readily available, you’ll be able to approach this plumbing task with confidence and efficiency. Gather your hammer drill, concrete screws, and adjustable wrench, and embark on this project with ease.
Materials
Ensuring a successful and secure installation when installing a toilet flange on concrete requires the proper materials. One essential material is a wax ring, which forms a tight seal between the toilet and the flange, ensuring no leaks or odors escape. To guarantee stability and prevent any movement or wobbling of the toilet, it is necessary to use concrete screws or anchors.
These fasteners firmly secure the flange to the concrete, providing a reliable installation. When working with concrete and tools, safety should always be a priority. Protect your hands and eyes by wearing gloves and goggles.
Concrete can be abrasive and contain harmful particles, so taking precautions is vital for your well-being. By utilizing the correct materials, such as a wax ring, concrete screws or anchors, and protective gear like gloves and goggles, you can confidently install a toilet flange on concrete. Not only will these materials enhance the stability and functionality of the flange, but they will also ensure a leak-free and odor-free experience for years to come, granting you peace of mind.

Remove the Old Toilet Flange
The art of removing an old toilet flange requires the right tools and a careful approach. Begin by equipping yourself with sturdy gloves and goggles to ensure your safety. Use a putty knife or scraper to eliminate any remnants of the previous wax ring.
To remove the old flange, start by turning off the water supply and flushing the toilet to empty the tank. Disconnect the water supply line with the help of an adjustable wrench. Next, remove the bolts that secure the toilet to the floor and gently lift it out of the way.
Now, direct your attention to the old flange. Utilize a wrench or pliers to loosen and remove the nuts that hold it in place. Once the nuts are off, lift the old flange out of the floor.
While you’re engaged in this process, take a moment to inspect the surrounding area for any signs of damage. Look out for cracks or wear and tear that require attention before installing the new flange. A sturdy foundation is essential for preventing future complications.
Having successfully removed the old flange and assessed the area, you are now prepared for the next step: scraping off the old wax ring and cleaning the area in preparation for the installation of the new flange. Stay tuned for our comprehensive, step-by-step guide.
How to Replace a Toilet Flange on Concrete: A Step-by-Step Guide
- Remove the old toilet flange.
- Scrape off the old wax ring and clean the area.
- Choose the correct new toilet flange.
- Place the T-bolts in the new toilet flange.
- Position the toilet flange and drill holes into the concrete to install the screws.
Scrape off Old Wax Ring and Clean the Area
As you embark on the installation of a new toilet flange on concrete, the first step is to cleanse the surface. Utilize a putty knife or scraper to diligently eliminate any remnants of the previous wax ring, all the while being careful not to harm the concrete. Afterward, meticulously cleanse the area with a gentle detergent and water to establish a foundation that is hygienic.
It is imperative to ensure that the area is completely dry before moving forward. By diligently following these measures, you will guarantee a steadfast and impervious installation, thus thwarting any prospective leaks or unpleasant odors.
By the way, if you’re looking for tips on how to secure a toilet flange to concrete, check out this helpful guide on toilet flange installation on concrete .
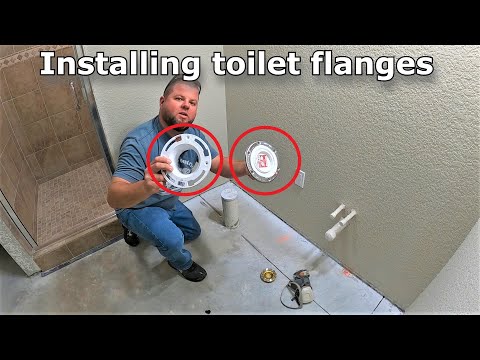
Choosing the Correct New Toilet Flange
Selecting the perfect toilet flange requires careful consideration. It is essential to ensure compatibility with your toilet, as different toilets may require different types of flanges. Thorough research is necessary.
Accurate measurement is key to prevent leaks and ensure a tight fit. The flange must securely attach to the waste pipe, leaving no room for error. The material of the flange is another crucial factor to ponder.
PVC and cast iron offer different advantages and durability. Choose wisely based on your specific needs. In conclusion, the right flange is indispensable for a successful toilet installation.
Take into account compatibility, dimensions, and material to guarantee a stable and long-lasting fixture.

Placement of T-Bolts in New Toilet Flange
Achieving a secure and durable toilet installation requires meticulous attention to the alignment and placement of T-bolts. Ensuring that these bolts are evenly spaced around the flange not only helps distribute the weight of the toilet evenly but also minimizes the chances of leakage. Additionally, incorporating washers with the T-bolts guarantees a tight seal, effectively preventing any unpleasant water or odor seepage.
Follow these simple yet crucial steps to guarantee a stable and trustworthy toilet installation .
If you’re looking for more information about toilet flange dimensions, check out our article on toilet flange dimensions to learn everything you need to know.
Installing a Toilet Flange on Concrete: A Step-by-Step Guide to a Sturdy and Watertight Connection
- A toilet flange is a circular piece of plumbing that is installed on the floor to secure the toilet bowl to the drainpipe.
- It is an important component of the toilet installation because it provides a sturdy and watertight connection between the toilet and the sewer system.
- Before starting the installation, it is crucial to take safety precautions such as wearing gloves and safety goggles to protect yourself from any potential hazards.
Positioning the Toilet Flange
Ensuring the correct positioning of the toilet flange is vital for a stable installation. Achieving a seamless and secure appearance requires aligning the flange with the floor. This not only provides a strong base for attaching the toilet but also promotes efficient waste disposal by aligning with the waste pipe.
Taking the necessary steps to position the flange correctly guarantees a secure installation and avoids potential problems in the future. Remember to align the flange with the floor and consider the waste pipe location for a successful connection.
Drilling Holes into Concrete and Installing the Screws
Creating a secure and stable toilet flange installation on concrete is a task that demands precision and care. To prevent any untoward damage, here is a step-by-step guide that will help you accomplish this with ease: Step 1: Employ a hammer drill specifically designed for concrete to bore the necessary holes. This will guarantee optimal penetration, ensuring a strong foundation for your flange.
Step 2: Utilize anchors or screws specially crafted for concrete installations. These resilient materials are built to withstand the weight of the toilet, providing long-lasting support. Step 3: Thoroughly tighten the anchors or screws, ensuring they are firmly in place.
This will grant stability to your flange, preventing any undesirable wobbling. By adhering to these meticulous steps, you can achieve a flawlessly stable flange installation on concrete. This will not only safeguard the integrity of the concrete but also guarantee the seamless functioning of your toilet for countless years to come.

Set the New Wax Ring on the Flange
Creating a watertight seal and preventing leaks and odors, installing a toilet flange on concrete involves setting a new wax ring. To ensure a secure installation, align the ring evenly over the flange, covering its entire circumference. Not only does this maintain the integrity of your toilet system, but it also keeps your bathroom clean and free from unpleasant odors.
Take a moment to center the wax ring and firmly press it down for a tight seal. By doing so, you’ll be rewarded with a hassle-free and dependable toilet system that will last for years.
Comparison of Toilet Flange Types – Tabelle
| Flange Type | Description | Material | Compatibility | Installation Method | Leveling Adjustment | Seal Quality | Durability | Price Range | Pros and Cons | Recommended Usage | Manufacturer/Brand |
|---|---|---|---|---|---|---|---|---|---|---|---|
| Full-Flush Toilet Flange | A flange designed for standard toilet installations. It provides a secure and tight connection to the toilet. | PVC | Compatible with standard toilets | 1. Attach the flange to the drainpipe using screws or adhesive 2. Connect the toilet to the flange using bolts |
No leveling adjustment | Effective in preventing leaks and odors | Durable and resistant to corrosion | $10 – $20 | Pros: Easy installation, good seal quality Cons: Limited compatibility with non-standard toilets |
Recommended for standard toilet installations | Brand A |
| Offset Toilet Flange | A flange that allows for horizontal adjustment to accommodate toilets that are not centered on the drainpipe. | ABS | Compatible with standard and elongated toilets | 1. Attach the flange to the drainpipe using screws or adhesive 2. Connect the toilet to the flange using bolts |
No leveling adjustment | Effective in preventing leaks and odors | Durable and resistant to corrosion | $15 – $25 | Pros: Adjustable offset, good seal quality Cons: Limited compatibility with high-efficiency toilets |
Recommended for toilets with off-center drainpipes | Brand B |
| Push-Tite Toilet Flange | A flange that requires no drilling or screws for installation. It provides a secure connection to the toilet. | Stainless Steel | Compatible with standard and high-efficiency toilets | 1. Push the flange into the drainpipe until it locks in place | No leveling adjustment | Effective in preventing leaks and odors | Durable and resistant to corrosion | $20 – $30 | Pros: Easy installation, good seal quality Cons: Limited compatibility with elongated toilets |
Recommended for easy and secure installations | Brand C |
| Twist-N-Set Toilet Flange | A flange that allows for vertical adjustment to accommodate uneven concrete surfaces. | PVC | Compatible with standard and elongated toilets | 1. Attach the flange to the drainpipe using screws or adhesive 2. Twist the flange to adjust the height for leveling 3. Connect the toilet to the flange using bolts |
Adjustable height for leveling | Effective in preventing leaks and odors | Durable and resistant to corrosion | $25 – $35 | Pros: Adjustable height, good seal quality Cons: Limited compatibility with high-efficiency toilets |
Recommended for uneven concrete surfaces | Brand D |
Installation of the Toilet Bowl
Crafting a bathroom that exudes stability and elegance requires a meticulous approach, beginning with the installation of the toilet bowl. This vital step not only ensures a leak-free sanctuary but also guarantees a sense of tranquility in your daily routines. To achieve this harmonious equilibrium, it is imperative to align the bowl securely to the flange, banishing any potential for movement or unsettling wobbling.
This can be achieved by utilizing the indispensable wax ring, which acts as a guardian against leaks and unwelcome odors. With deftness and precision, place the wax ring evenly on the flange, ensuring a seamless connection between bowl and flange. To solidify this union and prevent any unwanted drips or seepage, tighten all bolts evenly.
This meticulous attention to detail prevents the wax ring from shifting or losing its grip, guaranteeing a flawless installation. Remember, even the slightest imbalance can lead to potential leaks, disrupting the serenity of your sanctuary. With these meticulous steps, you can revel in the knowledge that your bathroom will remain stable and impervious to leaks for years to come.
Invest your trust in this process , and in return, you will be rewarded with a functional and harmonious bathroom that truly stands the test of time.

Connecting the Water Supply Line
In the delicate dance of connecting the water supply line to the toilet flange, proper installation is paramount. To simplify matters, opt for a flexible supply line that offers flexibility and room for adjustments. Begin by carefully measuring and cutting the supply line to the precise length required.
With an adjustable wrench, tightly fasten one end to the toilet flange, ensuring a sturdy connection. Once the supply line is in place, turn on the water supply and diligently inspect for any signs of leakage. Should you encounter any, swiftly address the issue by tightening the connection or employing plumber’s tape or a sealant for an impenetrable seal.
Bear in mind, a secure connection is the linchpin to preventing leaks and guaranteeing the smooth operation of your toilet. Dedicate the time and effort needed to connect the supply line correctly, sparing yourself from future headaches and exorbitant repair costs.
If your toilet flange is cracked, you should definitely check out our article “Cracked Toilet Flange” to find out how to fix it and prevent further damage.
2/5 Common Challenges and How to Overcome Them
Installing a toilet flange on concrete can present its fair share of obstacles. One such challenge involves cracked concrete, which has the potential to compromise the stability of the flange. To address this issue, a concrete patching compound can be utilized to fill in the cracks and restore the concrete’s strength.
Another potential hurdle lies in aligning the flange with the waste pipe. If perfect alignment proves elusive, a flexible toilet connector can be employed to facilitate the installation process. Even with a proper installation, the occurrence of leaks or odors is not entirely out of the question.
In such cases, it is advisable to inspect the wax ring, as it plays a crucial role in creating a watertight seal between the toilet and the flange. Should the wax ring be damaged or improperly installed, it is recommended to replace it and ensure it is securely in place. By remaining cognizant of these challenges and possessing the knowledge necessary to overcome them, one can guarantee a successful installation.
It is essential to allocate ample time, adhere to proper techniques, and seek professional assistance if required.

In this informative video, learn how to install a toilet flange on concrete, and get tips on finishing up the bathroom flooring. Watch now to ensure a successful DIY project!
3/5 When to Call a Professional
Recognizing the right time to enlist a professional for toilet flange installation on concrete is a wise decision. It eliminates the risk of wasting time, money, and encountering unnecessary frustrations. When lacking the essential tools and experience, it becomes evident that professional assistance is necessary.
Plumbers possess the knowledge and equipment required for a secure installation. They possess the expertise to tackle challenges such as cracked concrete or aligning the flange with the waste pipe. Furthermore, their access to top-notch materials and valuable advice based on their experience ensures a seamless and triumphant installation, sparing you from any potential headaches.
4/5 Get in Touch for More Plumbing Solutions
In search of top-notch plumbing guidance? Fortunate for you, the wisdom of a seasoned plumber brings forth a multitude of advantages. With their proficiency and know-how, they can tailor solutions to your specific needs, whether it be a pesky leaky faucet or a stubborn clogged drain.
Consistent maintenance plays a vital role in averting costly complications down the road. By scheduling routine inspections and upkeep with a plumber, you can detect potential issues early on, ultimately saving both time and money. To locate trustworthy plumbers, seek recommendations from loved ones or peruse online directories and review sites.
Don’t let plumbing mishaps overwhelm you. Prioritize regular maintenance and seek the counsel of professionals to ensure the longevity of your plumbing system.
5/5 CONCLUSION
In conclusion, understanding how to install a toilet flange on concrete is essential for any DIY plumber . The step-by-step guide provided in this article, along with the necessary safety precautions and required tools, ensures a successful installation process. By following these instructions, readers can overcome common challenges and avoid the need to call a professional.
We hope this article has been helpful in providing a comprehensive solution to the search intent of the keyword “toilet flange on concrete.” For more plumbing solutions and expert advice, we encourage you to explore our other articles on various plumbing topics.
FAQ
How do you anchor a toilet flange to concrete?
To securely attach the toilet flange to a concrete slab, you can utilize Tapcon anchors or a comparable type of masonry/concrete screw. It’s important to exercise caution when using plastic flange rings to avoid cracking them by over-tightening the anchors. This method of fastening provides a reliable and durable connection between the flange and the concrete slab, ensuring the stability of the toilet installation.
Does toilet flange sit on concrete or tile?
When renovating your bathroom floor, it’s important to remove the toilet in order to properly install tiles underneath it. This ensures a seamless and professional finish. Once the tiles are in place, you can then position the toilet flange on top to secure the toilet. By following these steps, you can achieve a well-executed bathroom renovation.
Does toilet flange go on top of cement board?
It is recommended to install the toilet flange on top of the finished floor to ensure proper functioning. Installing the flange flush with or below the finished floor can result in leak paths, as the flange will not be at the correct height to accommodate the horn at the bottom of the toilet. This can lead to potential water leaks and other issues. Therefore, it is important to follow the best practice of placing the toilet flange on top of the finished floor for optimal performance and prevention of leaks.
Can a toilet be installed on a concrete slab?
One common method for installing plumbing is to cut through the concrete slab in order to lay the pipes and connect them to the existing sewer connection. By following this approach, you can ensure proper installation and functionality of your plumbing system. This method has been widely practiced in the industry and is considered a traditional way of completing plumbing installations.