Welcome to our article on how to lower the water level in a toilet bowl. Adjusting the water level in a toilet bowl is not only important for maintaining proper functionality, but it can also help conserve water and prevent potential issues such as overflowing. Understanding how to lower the water level in a toilet bowl can save you from unnecessary expenses and headaches.
Did you know that a constantly high water level in a toilet bowl can lead to increased water bills and even damage to your bathroom floor? In this article, we will guide you through the steps to lower the water level in a toilet bowl and provide additional tips for proper toilet maintenance . So, let’s dive in and learn how to keep your toilet in optimal condition.
If you’re wondering how to increase the water level in your toilet bowl, check out our article on “Raising Toilet Bowl Water Level” for easy tips and tricks.
Quick check: the highlights of the article
- Adjusting the water level in your toilet bowl is necessary for proper functioning.
- High water levels in the toilet bowl can indicate a problem.
- Steps to lower the water level include adjusting the ball-and-arm float, modifying a cylinder float, or replacing the fill valve.

1/4 Why It’s Necessary to Adjust the Water Level in Your Toilet Bowl
In the realm of toilet maintenance, one must not disregard the crucial duty of regulating the water level in the porcelain throne. A lofty water level may wreak havoc upon your toilet, birthing leaks and fractures in its delicate structure. Moreover, it heightens the peril of clogs and overflows, a most undesirable predicament.
Conversely, adjusting the water level to its rightful position bestows upon you the gifts of water preservation, reduced utility expenses, and safeguarded against exorbitant repairs. By taking this seemingly insignificant action, you uphold the toilet’s functionality while championing the noble cause of water conservation.
2/4 Indications of High Water Levels in Your Toilet Bowl
It is of utmost importance to monitor the water level in your toilet bowl. Elevated water levels can result in a range of troublesome consequences, highlighting the need for early detection. Indicators such as sluggish drainage or flushing, gurgling noises during flushing, and water spilling over the bowl serve as clear signs of a high water level.
Reacting promptly to these cues is crucial in order to safeguard your bathroom floor from harm and avoid costly repairs. By heeding these warning signs, you can intercept elevated water levels before they escalate into more severe issues. Adjusting the water level is a vital preventive measure to avert blockages, overflow, and potential toilet damage.
If you’re dealing with a lower water level in your toilet bowl, check out our article on how to fix a lower water level in the toilet bowl for helpful tips and solutions.

Easy Fixes to Lower the Water Level in Your Toilet Bowl
- Adjusting the Ball-and-Arm Float
- Modifying a Cylinder Float
- Replacing the Fill Valve
Adjusting the Ball-and-Arm Float
Achieving the perfect water level in your toilet is crucial. Begin by locating the ball-and-arm float inside the tank. It consists of a ball attached to a metal arm.
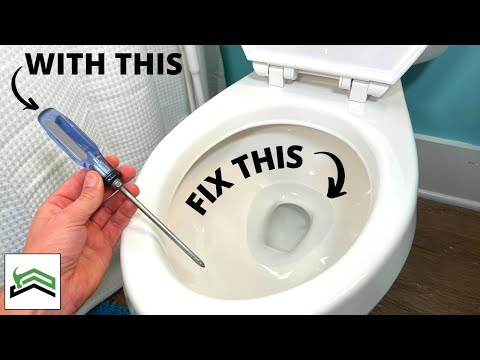
Next, find the fill valve, which controls the water flow, and turn off the water supply. Flush the toilet to empty the tank and locate the adjustment screw on the fill valve. Loosen it to move the ball and arm up or down, aiming for a water level approximately 1 inch below the overflow tube.
Be cautious not to set it too high, as it can lead to damage or clogging, or too low , affecting flushing efficiency. Find the ideal balance to ensure optimal performance and prevent potential issues .
Modifying a Cylinder Float
Transforming Water Levels in Your Toilet: A Delicate Art Embarking on a journey to alter the water level in your toilet bowl requires a deft touch and a keen eye for detail. The key lies in the modification of a humble cylinder float, a process that demands precision and finesse. Before delving into the delicate dance of adjustments, one must first locate the elusive cylinder float within the tank, its connection to the fill valve serving as a guiding beacon.
Once uncovered, the transformation can commence. With dexterity at the forefront, there are two paths to choose from, depending on the nature of your cylinder float. Whether it be the gentle bending of the metal rod or the manipulation of the screw mechanism, these actions hold the power to elevate or descend the float, thereby orchestrating the water level within the tank.
Caution, however, must be exercised at every turn. The realm of cylinder float modification is not without its perils. The potential pitfalls of malfunctioning floats or disconcertingly inaccurate adjustments loom ominously.
In such moments of uncertainty, the wisdom of a professional plumber becomes an invaluable asset. Yet, amidst the treacherous terrain, the rewards of cylinder float modification shine brightly. The preservation of water, an act of admirable conservation , emerges as a paramount benefit.
By fine-tuning the water level to an optimal threshold, wastage becomes a relic of the past, with financial respite following suit. A triumph for both the environment and your hard-earned savings. Thus, should the desire arise to diminish the water level within your toilet bowl, the modification of the cylinder float stands as an alluring solution.
Embrace the path with care, following each step meticulously, and remaining vigilant in the face of any tribulations that may arise. The end result? A symphony of efficiency and sustainability, orchestrated by your own hand.
If you’re dealing with a pesky toilet tank that leaks at the bolts, check out our article “Toilet Tank Leaks at Bolts” for some helpful tips on how to fix the problem and prevent future leaks.


Replacing the Fill Valve
Signs that it’s time to replace the fill valve: If you’re tired of your toilet constantly running and the water level adjustments don’t help, it’s a clear sign that you need to replace the fill valve. Additionally, if you hear a persistent hissing sound coming from the tank, it means the valve is not closing properly and needs to be replaced. The ultimate guide to replacing the fill valve: Don’t worry, replacing the fill valve is not as intimidating as it seems.
Start by turning off the water supply by shutting the valve located behind the toilet. Then, flush the toilet to drain the tank completely. Next, disconnect the water supply line from the bottom of the tank.
Unscrew and remove the old fill valve. Now, it’s time to install the new one by securely screwing it into place. Reconnect the water supply line and turn the water back on.
Finally, flush the toilet to ensure that the new fill valve is functioning properly. The benefits of replacing the fill valve: Replacing the fill valve comes with numerous advantages, particularly when it comes to water usage. A faulty fill valve leads to continuous water wastage and can result in higher water bills.
By replacing it, you not only conserve water but also save money. Additionally, a new fill valve helps prevent leaks and potential water damage in your bathroom. So, don’t hesitate to replace it if you notice any issues.
3/4 Additional Tips for Lowering Water Levels in Your Toilet
In the pursuit of water conservation and cost-saving measures, there are simple yet effective ways to lower the water level in your toilet. Adjusting the flush volume allows for precise control, ensuring only the necessary amount of water is used. Alternatively, a toilet dam can be utilized to restrict water flow and reduce the water level in the bowl.
Regularly inspecting for leaks is crucial, as it prevents unnecessary water flow and helps maintain a lower water level. By implementing these practical tips, not only do you contribute to the preservation of this vital resource, but you also keep your toilet in optimal condition.
If you’re dealing with a low water level in your toilet bowl, we’ve got an easy fix for you! In this informative video, you’ll learn step-by-step how to lower the water level and resolve the issue. Say goodbye to toilet troubles with this simple solution!
What is the ideal water level in a toilet bowl?
Finding the perfect water level in a toilet is vital for optimal performance. Excessive water can lead to issues like clogs and overflow, while insufficient water can result in ineffective flushing. To accurately measure and adjust the water level, utilize a ruler or measuring tape to gauge the distance between the water level and the overflow tube’s top.
Modify the ball-and-arm float or cylinder float as needed to achieve the desired water level. By maintaining the correct water level, you ensure efficient flushing, prevent clogs, and conserve water. Regularly monitoring and adjusting the water level will extend the lifespan of your toilet.
If you’re struggling with adjusting the water level in your toilet bowl, check out our article “Adjusting the Water Level in a Toilet Bowl” for helpful tips and tricks.

How can I tell if my fill valve needs replacement?
The telltale signs of a faulty fill valve, indicating the urgent need for replacement: The sound of running water echoing through the toilet bowl is an ominous clue that your fill valve is on the brink of failure. As this faulty valve persists, you may find yourself facing excessive water wastage and soaring utility bills. Moreover, an inconsistent water level in the bowl signifies trouble, as it can lead to unpredictable flushing and the dreaded possibility of clogs.
Unearthing leaks and water wastage from the fill valve: Unmasking leaks and water wastage caused by a fill valve gone awry is a task that requires a few drops of food coloring. Simply add the dye to the toilet tank, and after a brief wait, observe if the water in the bowl begins to change color. If it does, you have detected a leak.
Additionally, keep your ears attuned to the telltale sounds of hissing or gurgling emanating from the tank, as these too can be signs of a leak. Recognizing the gravity of addressing fill valve issues promptly: Swift action is of utmost importance when confronted with fill valve issues. Failing to address this problem promptly can lead to dire consequences for your toilet and the precious resource of water.
With a faulty fill valve, water flows continuously, draining it needlessly and placing undue strain on your plumbing system. Neglecting this issue may result in water damage to your bathroom floor, creating a breeding ground for mold and mildew. By replacing the fill valve as soon as signs of malfunction arise, you can ensure the efficient use of water and safeguard yourself from costly repairs in the future.
Helpful Plumbing Solutions: Tabelle for Adjusting and Modifying Toilet Water Levels
| Method | Description | Difficulty Level | Tools Required | Steps |
|---|---|---|---|---|
| Adjusting the Ball-and-Arm Float | Learn how to adjust the ball-and-arm float to lower the water level in the toilet bowl. | Easy | Screwdriver, cup, or bucket | 1. Locate the ball-and-arm float assembly in the toilet tank. 2. Adjust the float by bending the float arm downwards or adjusting the screw. 3. Test the water level by flushing the toilet and observe if it has decreased to the desired level. 4. If necessary, readjust the float until the desired water level is achieved. |
| Modifying a Cylinder Float | Discover how to modify a cylinder float to lower the water level in the toilet bowl. | Moderate | Adjustable pliers, cup, or bucket | 1. Turn off the water supply to the toilet by closing the shut-off valve located behind or near the toilet. 2. Remove the float assembly by disconnecting it from the fill valve. 3. Adjust the float by bending the arm or modifying the float mechanism according to the specific design. 4. Reinstall the modified float assembly and ensure it is securely connected to the fill valve. 5. Turn on the water supply and observe the water level in the toilet bowl. 6. If necessary, repeat the adjustment process until the desired water level is achieved. |
| Replacing the Fill Valve | Learn how to replace the fill valve to lower the water level in the toilet bowl. | Advanced | Adjustable pliers, wrench, bucket or towels, new fill valve | 1. Turn off the water supply to the toilet by closing the shut-off valve. 2. Flush the toilet to drain the water from the tank. 3. Disconnect the water supply line from the fill valve using adjustable pliers. 4. Remove the old fill valve by unscrewing it from the bottom of the tank using a wrench. 5. Install the new fill valve according to the manufacturer’s instructions, ensuring a proper fit and alignment. 6. Reconnect the water supply line to the new fill valve and tighten securely. 7. Turn on the water supply and allow the tank to fill. 8. Adjust the water level using the new fill valve’s adjustments until the desired level is reached. 9. Check for any leaks and make necessary adjustments or repairs. |
| Additional Tips for Lowering Water Levels | Discover additional tips and tricks to further reduce water levels in the toilet bowl. | N/A | N/A | 1. Check for any leaks in the toilet tank or flapper and repair them promptly. 2. Install a water-saving toilet fill valve or consider using a dual-flush conversion kit to reduce water usage. 3. Consider replacing your toilet with a low-flow or ultra-low-flow model to significantly reduce water consumption. 4. Regularly inspect and clean the toilet bowl to prevent clogs and maintain efficient water flow. |
| When to Consider Professional Help | Learn when it is recommended to seek assistance from a professional plumber. | N/A | N/A | 1. If the water level cannot be adjusted using DIY methods or persists at an excessively high level. 2. If there are underlying plumbing issues causing high water levels or recurring problems. 3. If you are uncomfortable performing plumbing tasks yourself or lack the necessary tools or expertise. |
Can I lower the water level without any professional help?
Achieving a lower water level in your toilet bowl is indeed possible without the need for professional assistance. One approach involves adjusting the ball-and-arm float found in the toilet tank. By simply lowering the float, you can reduce the amount of water that enters the tank, subsequently leading to a decrease in the water level within the bowl.
However, it is crucial to exercise caution to avoid complications such as a toilet that constantly runs. Alternatively, you can modify a cylinder float by either bending the float arm or adjusting the screw on the valve. Yet, it is important to remain mindful of potential issues such as a malfunctioning fill valve or leaks.
It must be emphasized that attempting these methods without prior experience may result in more harm than good. Therefore, it is highly recommended to consult a professional plumber in order to ensure a safe and effective outcome.

Guide on Regular Toilet Maintenance
Maintaining your toilet is essential for its longevity and functionality. To avoid any potential problems, regular upkeep is necessary. Begin by thoroughly cleaning and disinfecting the bowl, seat, lid, and exterior using a gentle cleaning solution and a toilet brush.
This not only ensures a fresh appearance but also prevents the formation of unsightly stains. Alongside regular cleaning, it is crucial to be proactive in identifying and resolving common issues. If you detect a leak, promptly address it to prevent any further damage.
Common problems such as a running toilet , weak flush , or clogged drain can be solved with troubleshooting techniques . By doing so, you can save money on plumber expenses and maintain a smoothly functioning toilet. By incorporating these straightforward maintenance tasks into your cleaning routine, you can guarantee optimal performance and avoid costly repairs.
Embrace the benefits of a hygienic and well-functioning toilet that will serve you well for years to come.
How to Lower the Water Level in Your Toilet Bowl: Simple Steps for a More Efficient Flush
- Adjusting the water level in your toilet bowl is important for several reasons. Firstly, a high water level can lead to frequent clogs and overflow issues. Secondly, it can cause unnecessary water wastage, increasing your utility bills. Lastly, a properly adjusted water level ensures efficient flushing and prevents the toilet from running continuously.
- Indications of high water levels in your toilet bowl include water overflowing when flushed, a gurgling sound after flushing, and slow drainage. If you notice any of these signs, it’s time to lower the water level.
- To lower the water level in your toilet bowl, you have a few options. One method is adjusting the ball-and-arm float. This float controls the water level by rising and falling with the water. Adjusting the float can be done by bending the arm downwards to decrease the water level or upwards to increase it.
- If your toilet has a cylinder float, you can modify it to lower the water level. This can be done by adjusting the screw or clip on the float to raise or lower the float arm. By lowering the float arm, you decrease the water level in the bowl.
Tips for Hiring a Reliable Plumber
When searching for a skilled plumber, there are key factors to consider. Begin by posing the appropriate inquiries during the interview process. Inquire about their background, certifications, and guarantees.
Validating proper licensing and insurance is of utmost importance. This not only confirms their competence but also safeguards you in the event of mishaps. Equally vital is the act of comparing price estimates.
Obtain quotes from multiple plumbers to ensure fairness. Request a detailed breakdown of expenses for accurate comparisons. In conclusion, securing a dependable plumber entails thorough questioning, credential verification, and price comparison.
By following these steps, you can enlist a professional who will deliver superior craftsmanship and tranquility of mind.
4/4 CONCLUSION
In conclusion, adjusting the water level in your toilet bowl is essential for proper functioning and to prevent any potential issues. By following the steps outlined in this article, you can easily lower the water level and ensure efficient flushing. It is important to regularly check for indications of high water levels and address them promptly.
While some adjustments can be done on your own, there may be instances where professional help is necessary. Remember to maintain a safe and ideal water level in your toilet bowl to avoid any plumbing problems . For further resources on regular toilet maintenance and tips for hiring a reliable plumber, we recommend exploring our other articles on these topics.
FAQ
Is there a way to reduce water in toilet bowl?
To lower the water level in the bowl, you have a few options. Firstly, you can adjust the tube to allow less water to flow into the bowl. Another option is to use an adjustable clamp to control the amount of water entering the bowl. If these methods don’t achieve the desired result, you can drill holes in the tube to allow some water to leak into the tank before reaching the bowl. These modifications will help you effectively manage the water level in the toilet bowl.
What to do if toilet water is high?
A blocked drain can cause water to overflow from the toilet’s bowl instead of the tank, resulting in a messy situation. To prevent this overflow, it is necessary to address the clog. For minor clogs, using a plunger and applying some effort should generally resolve the issue.
