Are you experiencing issues with adjusting the water level in a toilet bowl? If so, you’re not alone. Many homeowners encounter this problem, and it can be frustrating and inconvenient.
In this article, we will guide you through the process of adjusting the water level in a toilet bowl, providing step-by-step instructions and troubleshooting tips. Whether you have a ball-and-arm float or a cylinder float mechanism, we’ve got you covered. Plus, we’ll share preventive measures to maintain proper water levels and answer common questions about toilet fill valves.
So, if you’re tired of dealing with incorrect water levels in a toilet, keep reading to learn how to fix the problem and ensure a properly functioning toilet.
In three sentences: The essentials in a nutshell
- The text provides information on identifying signs of incorrect water levels in a toilet bowl.
- It explains the different types of toilet mechanisms and provides a step-by-step guide on adjusting the water level.
- The text also offers troubleshooting tips, preventive measures, and advice on DIY vs. professional help for toilet issues.

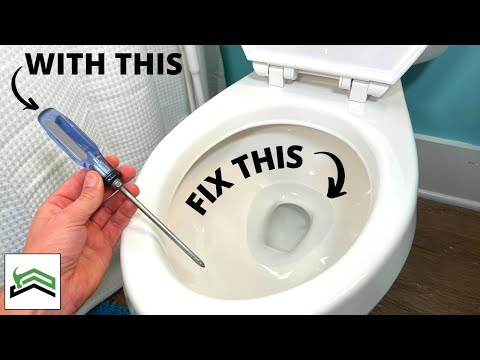
1/3 Identifying the Problem: Signs of Incorrect Water Levels in Your Toilet Bowl
Water levels in a toilet bowl can cause various issues. If the water level is too high, it may overflow or make a gurgling sound. Conversely, if the water level is too low, you may experience weak flushes or difficulty in removing waste effectively.
Both high and low water levels can have significant consequences. A high water level can lead to frequent clogs and constant plunging, wasting time and water. On the other hand, a low water level can result in inadequate waste removal, requiring multiple flushes and increasing the risk of clogs.
To determine the ideal water level, conduct a simple test. Note the water level when the toilet is not in use, then flush it and observe the refill. The water level should rise just below the overflow tube for efficient flushing and to prevent overflow.
By recognizing the signs of incorrect water levels, understanding their impact, and knowing how to establish the optimal water level , you can maintain a properly functioning toilet and avoid unnecessary problems.
If you’re wondering how to adjust the water level in your toilet tank, check out our article “How to Adjust Water Level in Toilet Tank” for step-by-step instructions and tips on achieving the perfect water level.
Ball-and-Arm Float
In the realm of toilet troubles, there exists a vexing phenomenon where the ball-and-arm float refuses to adhere to the natural order of things. Instead of rising or falling as it should, it brings forth a cascade of chaos, resulting in either a perpetually running toilet or a feeble flush. But fear not, for there is a solution to this watery conundrum.
First, embark upon a quest to inspect the float, searching diligently for any debris that may impede its movement. Once discovered, remove said debris with a deft hand, freeing the float from its obstruction. Ah, but there is another quandary that may plague the porcelain throne.
It is the matter of water level, wherein the toilet bowl finds itself in a state of either excessive abundance or pitiful scarcity. To rectify this imbalance, seek out the adjustment screw or rod near the float assembly. With a twist to the counterclockwise, the water level shall diminish, while a clockwise turn shall raise it to new heights.
Proceed with caution, making slight adjustments and testing the flush until the desired water level is achieved. The ball-and-arm float, though a steadfast ally, is not without its faults. It possesses a simplicity and dependability that is to be admired, yet it can succumb to the perils of sticking or losing its balance.
Fear not, for with regular maintenance and troubleshooting, these issues can be vanquished, allowing you to regain control over the water level and restore harmony to your royal throne.
If you’re having trouble with your toilet water not filling up, check out our article on “Toilet Water Not Filling” to find out what could be causing the issue and how to fix it.

Cylinder Float
In the realm of toilet systems, the cylinder float reigns supreme, with its array of advantages and disadvantages. This unassuming device, shaped like a cylinder, effortlessly rises and falls with the water level in the tank, making it a breeze to troubleshoot and keep in top-notch condition. To unravel any common issues with the cylinder float, cast your gaze upon any potential obstructions or debris that may impede its graceful movements.
Give the float and its immediate surroundings a thorough cleansing to ensure a seamless operation. Should the float find itself damaged or functioning less than optimally, fear not – for it may be time to bid adieu and welcome a replacement. Remember, my dear reader, proper maintenance is the key to unlocking the full potential of this steadfast companion.
Regularly inspect the float, ever vigilant for any signs of wear or damage, and be swift to replace it, if need be. Furthermore, ensure its alignment is true, for a misaligned float can bring forth a myriad of water level woes. Alas, even in its simplicity and ease of care, the cylinder float does possess a few shortcomings.
Beware the moments when it becomes ensnared in the up or down position, leading to a disarray of water levels in the bowl. And let us not forget the float arm, a companion in need of frequent adjustments to maintain the desired water level. In the grand tapestry of toilet systems, the cylinder float stands as a stalwart, offering the gift of simplicity and effortless maintenance .
With a discerning eye and proper care, you shall wield the power to control the water level in your porcelain throne, ensuring its optimal performance.

Are you tired of dealing with low water levels in your toilet bowl? Check out this video for an easy fix to adjust the water level and improve the flushing performance. Say goodbye to clogs and hello to a fully functioning toilet!
How to Adjust a Ball-and-Arm Float
In the realm of toilet troubleshooting, tinkering with a ball-and- arm float can give rise to a host of vexations. If perchance the float hangs too low, your toilet may never cease its ceaseless flow . This could be ascribed to an aging ball or arm, or a fill valve that has been askewly calibrated .
Conversely, if the float hovers too high, the water level in the toilet bowl may plummet, leading to feeble flushes. This unfortunate occurrence could be rooted in an arm that is bent or misaligned, or a fill valve that has gone astray. To rectify this conundrum, commence by shutting off the water supply to the toilet.
Next, locate the adjustment screw on the fill valve and employ a trusty screwdriver to fine-tune the ball’s elevation. Remember, the ball must rest just below the overflow tube to effectively halt the water flow once the tank reaches capacity. Subsequently, scrutinize and modify the float arm.
Ensure that it remains unbent and unscathed, and moves with unimpeded freedom. If necessary, gently reshape the arm to achieve proper alignment with the ball. This harmonious relationship will empower the float arm to govern the water level in the toilet bowl with precision.
By addressing these customary conundrums and skillfully adjusting the ball-and-arm float , you shall cultivate an environment of optimal water levels in your toilet , effectively staving off any future predicaments.
If you’re wondering how to adjust the water level in your toilet, check out our article “Adjusting Water Level in Your Toilet” for easy steps and helpful tips.
How to Adjust a Cylinder Float
In the realm of toilets , a simple yet critical component can sometimes wreak havoc on the delicate balance of water. Enter the notorious cylinder float mechanism, capable of disrupting the water level in the bowl with its whimsical behavior. Whether it’s an excessive flood or a meager trickle, this mischievous contraption has the power to wreak havoc on your porcelain throne.
But fear not, for there is a solution to this perplexing puzzle. With a keen eye and a steady hand, one can dare to venture into the realm of float height adjustment. Seek out the elusive adjustment screw or rod, and with a flick of the wrist, change its position.
A delicate dance of precision and finesse, it is an art unto itself. Yet, should this gallant effort fail to tame the rebellious float, one must delve deeper into the mysteries of troubleshooting. Cast a discerning gaze upon the float’s surroundings, for there may lurk the hidden culprits of blockages and debris.
Cleanse the float and its domain, restoring harmony and fluidity to its movements. And if all else fails, a solemn decision may need to be made – the replacement of the float mechanism, a sacrifice for the greater good. For in the realm of toilets, the water level holds great significance.
It is the key to efficient flushing and a guardian against the dreaded overflow. Arm yourself with knowledge, dear reader, for by understanding the trials and tribulations of the cylinder float, you hold the power to maintain the perfect equilibrium. May your water levels be ever precise, and your toilet forever in harmonious operation.

How to Install a New Fill Valve
Experiencing toilet issues ? Don’t worry! Fixing it is easier than you think.
1. Locate the shut-off valve: Find the valve near the base of the toilet or on the wall behind it. Turn it off to stop the water flow.
2. Empty the tank: Flush the toilet and use a towel or sponge to remove any remaining water.
3. Remove the old fill valve: Disconnect the water supply line and remove any screws or attachments holding the old valve in place. Lift it out of the tank.
4. Prepare the new fill valve: Ensure that the new valve is compatible with your toilet model. Follow the manufacturer’s instructions for any necessary adjustments.
5. Install the new fill valve: Place the new valve in the tank, ensuring it is properly aligned. Secure it with screws or attachments. Reconnect the water supply line and tighten the nut.
6. Restore water supply: Turn on the water supply and check for any leaks. Adjust the float height if necessary. By following these simple steps and using the correct tools, you’ll have a well-functioning toilet with properly controlled water levels.
Say goodbye to toilet troubles and enjoy a smoothly running bathroom experience.
If you want to learn how to adjust the water level in your toilet, check out our article “How to Adjust Toilet Water Level” for step-by-step instructions and helpful tips.

How to Adjust the Water Level in Your Toilet Bowl
- Identify the type of toilet mechanism in your toilet bowl (ball-and-arm float or cylinder float).
- Adjust the water level in your toilet bowl accordingly:
- If you have a ball-and-arm float:
- Locate the adjustment screw on the float arm.
- Turn the screw clockwise to lower the water level or counterclockwise to raise it.
- Flush the toilet and check the water level. Repeat the adjustment if necessary.
Clearing Blocked Plumbing Vents
A clogged plumbing vent can lead to a range of issues like unpleasant smells, sluggish drainage, and toilet backups. Indicators of a blocked vent include strange gurgling sounds, slow draining, and water backing up into other fixtures when you flush. To resolve the blockage, you have options such as using a plumber’s snake or high-pressure water jet, or attempting a chemical drain cleaner.
It’s essential to regularly maintain your plumbing system to prevent vent blockages. Stay vigilant for signs of blockages and schedule regular inspections and cleanings to keep your toilet functioning smoothly and avoid any interruptions to your daily life.
Unclogging Pipes
Navigating the frustrating world of clogged pipes in a toilet system can leave even the most patient of individuals feeling exasperated. Whether it’s a result of excessive toilet paper usage, the flushing of non-flushable items, or the accumulation of mineral deposits and debris, these pesky clogs can lead to sluggish drainage, water backup, or worst of all, complete blockages. But fear not, for there are some do-it-yourself methods that can come to your rescue.
One option is to harness the power of a plunger, using it to create suction and dislodge the stubborn clog. Alternatively, a plumbing snake or auger can physically break up the blockage, freeing your pipes from their entanglements. For those who prefer a more chemical approach, drain cleaners can be employed to dissolve the clog, but caution should be exercised by following the manufacturer’s instructions to the letter.
Of course, prevention is always the best course of action. To avoid encountering these plumbing predicaments in the first place, it is essential to refrain from flushing excessive amounts of toilet paper or items that simply don’t belong in the pipes. Consider utilizing a drain cover or strainer to capture any rogue debris before it has a chance to cause trouble.
And don’t forget to give your toilet pipes some regular TLC by pouring hot water down the drain and concocting a mixture of baking soda and vinegar to combat any stubborn buildup. With a proactive mindset and a solid understanding of how to tackle pipe clogs, you’ll be able to ensure the seamless operation of your toilet system.

Fixing Hairline Cracks in Your Toilet
In the realm of homeownership, hairline cracks in toilet bowls reign as an all-too-familiar adversary. These cracks, like the wear and tear of time or the consequences of improper installation, can wreak havoc if left unattended. Swift action is of the essence to prevent further damage and potential leaks.
Thermal stress, a notorious culprit, is known to cause these hairline cracks. When opposing temperatures collide, such as scorching water meeting a frigid porcelain surface, the resulting expansion and contraction can crack the bowl. Likewise, the forceful impact of heavy objects can yield the same undesirable outcome.
Should you discover these cracks in your toilet bowl, immediate intervention is paramount. First, shut off the water supply and drain the tank. Thoroughly cleanse and dry the affected area before applying a porcelain repair kit .
Mind the instructions on the repair kit, as application methods may differ. Typically, you will need to concoct a repair compound and administer it to the cracks using a putty knife. Allow the compound to dry completely before sanding it down for a seamless finish.
Addressing these hairline cracks with urgency is crucial to thwart further harm. Left untreated, these cracks will fester over time, potentially leading to disastrous leaks. By tending to them promptly, you can preserve the integrity of your toilet bowl and evade costly repairs down the road.
How to Adjust the Water Level in a Toilet Bowl for Optimal Flushing
- The water level in a toilet bowl is important for proper flushing and preventing overflow.
- Signs of incorrect water levels in a toilet bowl include weak flushing, inconsistent water levels, and frequent clogs.
- There are different types of toilet mechanisms that control the water level, such as the ball-and-arm float and the cylinder float.
- To adjust the water level in a toilet bowl with a ball-and-arm float, you can bend the float arm downwards to lower the water level or bend it upwards to raise the water level.
- To adjust the water level in a toilet bowl with a cylinder float, you can adjust the height of the float by turning the adjustment screw.
2/3 Preventive Measures: Tips to Maintain Proper Water Levels in Your Toilet
Ensuring the optimal functioning of your toilet and maintaining the perfect water levels is crucial. Here are some valuable tips to assist you:
1. Regularly inspect for leaks. Keep an eye out for any accumulation of water around the base or listen for any dripping sounds.
2. Utilize a toilet bowl cleaner to combat mineral buildup . This will guarantee unhindered water flow and prevent any interference with water levels .
3. Adjust the fill valve to regulate water flow. This adjustment will prevent overflow or insufficient water levels by ensuring the tank fills to the appropriate level after each flush. By implementing these straightforward preventive measures, you can maintain your toilet’s pristine condition and avoid any water level-related complications.

How do I know if my toilet fill valve is full?
Ensuring a consistent water level in your toilet bowl is crucial for optimal performance. To determine if your fill valve is adequately filled, there are a few indicators to look out for. Keep an eye on the water in the tank, making sure it reaches the designated fill line.
Additionally, if you notice a continuous flow of water into the overflow tube, it’s a clear sign that the fill valve is full. For a definitive confirmation, simply lift the tank lid, flush the toilet, and observe the water level rise. A full fill valve not only guarantees efficient flushing but also helps prevent unnecessary water waste.
By staying attentive to these signs and adjusting the water level when necessary, you not only maintain your toilet’s functionality but also play a part in conserving water.
If you’re unsure about the size of your toilet bolts, check out our article on toilet bolt size for all the information you need to find the right fit.
What is a normal water level in a toilet bowl?
Maintaining the correct water level in a toilet bowl is crucial for its optimal performance . If the water level is too low, it can result in weak flushing and frequent clogs. On the other hand, if the water level is too high, it can lead to continuous running and increased water bills.
The ideal water level can be influenced by factors such as the type and design of the toilet. To determine the perfect level, simply remove the lid of the tank and observe the water level, which should be approximately one inch below the overflow tube or marked waterline. Make necessary adjustments to the float mechanism or fill valve accordingly.
By ensuring a normal water level, you not only enhance efficiency but also prevent potential issues from arising.
Toilet Mechanisms and Water Level Adjustment Methods Tabelle
| Toilet Mechanism | Water Level Adjustment Method |
|---|---|
| Ball-and-Arm Float | Adjusting the float’s position on the arm or bending the arm |
| Cylinder Float | Adjusting the float’s height or bending the float rod |
| Diaphragm Float | Adjusting the float’s position or replacing the diaphragm |
| Piston Float | Adjusting the float’s position or replacing the piston |
| Pressure-Assisted | Adjusting the pressure-assist unit or replacing the unit |
| Dual Flush | Adjusting the dual flush buttons or replacing the mechanism |
Should the toilet tank empty completely when flushed?
When you press the flush button on your toilet, you anticipate a swift and thorough evacuation of its contents. However, if the water level remains stubbornly high, it may indicate a problem with the water level adjustment. Proper water level adjustment in a toilet tank is vital for several reasons.
Firstly, it ensures efficient flushing, preventing any waste from lingering in the bowl. Additionally, it helps to preserve the integrity of the flushing mechanism , reducing the risk of unnecessary wear and tear. If your toilet tank fails to empty completely after flushing, it can lead to a range of issues.
Weak flushing power may leave waste behind, resulting in unpleasant odors. Moreover, it can cause continuous water running, leading to water wastage and potentially inflating your bill. To rectify a toilet tank that refuses to empty fully, begin by checking the water level and making any necessary adjustments.
This can typically be achieved by tinkering with the float arm or fill valve. Should this fail, it is possible that a blockage resides within the flush valve or drain pipe, which can be addressed using a plunger or plumbing snake. In conclusion, ensuring that your toilet tank empties completely when flushed is paramount for maintaining functionality and efficiency.
By comprehending the significance of water level adjustment and possessing the ability to troubleshoot and resolve issues, you can uphold the reliability of your toilet system.

Does pouring water down the toilet help it flush?
Sometimes, pouring water into the toilet can actually help improve flushing power by creating extra force and pressure to push waste through the pipes. However, it’s important to note that this method may not be effective if the toilet is completely clogged or if there is a more serious plumbing problem at hand. In such cases, it’s advisable to address the root cause of the issue or seek assistance from a professional plumber.
If pouring water doesn’t do the trick, you can try using a plunger or a toilet auger to unclog any obstructions. It’s crucial to remember that relying solely on pouring water may not always guarantee a solution. If you continue to experience persistent flushing problems, it might be worth exploring alternative methods or reaching out to a skilled plumber for expert advice.
Are you frustrated with a toilet that isn’t refilling after a flush? Check out our article on how to fix a toilet not refilling after flush for some helpful tips and solutions.
7 Easy Tips to Winterize Your Pipes and Prevent Plumbing Issues
Prepare Your Plumbing for Winter: 7 Essential Tips to Avoid Problems As the chilly winter season approaches, it’s crucial to ensure your plumbing is ready to withstand the cold. By taking a few simple steps, you can safeguard your pipes and prevent any potential issues from arising. Here are 7 easy tips to winterize your plumbing system and enjoy a hassle-free winter.
1. Common Winter Plumbing Problems and How to Prevent Them Winter brings its fair share of plumbing woes, such as freezing pipes, burst pipes, and clogged drains. To avoid these issues, start by insulating your pipes with sleeves or heat tape. This extra layer of protection will keep them warm and prevent freezing.
Additionally, keep your home well-heated and open cabinet doors to allow warm air to circulate. Lastly, avoid pouring grease down the drain, as it can solidify and cause blockages.
2. Steps to Winterize Your Pipes and Avoid Problems Taking proactive measures to winterize your pipes is crucial. Begin by disconnecting and draining outdoor hoses, as leaving them attached can lead to frozen pipes . Next, turn off the water supply to outdoor faucets and drain any remaining water.
Additionally, make sure to insulate any exposed pipes in unheated areas, such as basements or crawl spaces. Consider installing a frost-proof outdoor faucet for added protection against freezing.
3. The Importance of Regular Maintenance to Prevent Winter Plumbing Issues Regular maintenance is key to keeping your plumbing system in optimal condition during the winter. Schedule a professional inspection before the cold weather sets in to identify any potential problems. Address any leaks promptly to prevent further damage.
Lastly, don’t forget to clean your gutters to prevent ice dams and backups, which can put unnecessary strain on your pipes. By following these 7 tips, you can effectively winterize your pipes and ensure a worry-free season. Taking the time to prepare your plumbing system now will save you from potential headaches and costly repairs in the future.
Stay warm and enjoy the beauty of winter without any plumbing-related worries .

Did you know that the average person flushes the toilet about 2,500 times per year? That’s a lot of water flowing through the pipes!

6 Tips For Hiring a Plumber
Finding the right plumber can be a daunting task. However, there are a few key tips to keep in mind. Start by verifying their credentials and insurance coverage to ensure they are qualified and protected.
Take the time to read reviews and gather information about their skills and professionalism. It’s also important to obtain multiple quotes to compare prices and services. By taking these steps, you can increase your chances of hiring a dependable plumber.
Remember, a little effort upfront can save you from future headaches.
If you’re dealing with a cracked toilet tank, check out our article “Toilet Tank Crack Repair” to learn how to fix it and prevent any further damage.

A Reputable Plumber Will Possess These 7 Qualities
A reputable plumber possesses seven standout qualities. Firstly, they excel in communication, ensuring no misunderstandings occur. Secondly, they creatively solve complex problems.
Thirdly, they prioritize punctuality and reliability, especially in emergencies. Fourthly, they stay up-to-date with the latest techniques and equipment. Fifthly, they pay close attention to detail, ensuring a job is done right the first time.
Sixthly, they exhibit a strong work ethic and provide exceptional customer service. In conclusion, these qualities define an excellent plumber who consistently delivers satisfying service to their clients.
3/3 CONCLUSION
In conclusion, understanding how to adjust the water level in your toilet bowl is essential for maintaining proper functionality and preventing potential issues. By identifying signs of incorrect water levels and learning about different types of toilet mechanisms, such as the ball-and-arm float and cylinder float, you can effectively troubleshoot and make necessary adjustments. Additionally, this article provides step-by-step instructions for adjusting the water level and installing a new fill valve.
However, if adjusting doesn’t resolve the problem, further troubleshooting steps such as clearing blocked plumbing vents, unclogging pipes, or fixing hairline cracks may be necessary. To prevent future issues, implementing preventive measures and maintaining proper water levels in your toilet is crucial. While DIY solutions can often suffice, it’s important to know when to call a professional for help.
Overall, this article provides comprehensive information for readers seeking to adjust the water level in their toilet bowl, ensuring a functional and efficient plumbing system. For further reading, we recommend exploring our other articles on winterizing pipes , hiring a plumber, and the qualities of a reputable plumber.
FAQ
How high should water be in toilet bowl?
The water level in a toilet bowl is typically halfway full, ensuring that it sits above the P trap drain. This creates a seal and suction mechanism that prevents sewer gases from entering your home through the toilet. So when you flush the toilet, the suction effectively keeps these unpleasant odors away.
How do I increase water pressure in my toilet bowl?
Here are six effective methods to achieve a more powerful toilet flush in 2023: 1. Ensure clean rim jets: The rim jets are small holes located at the base of the toilet, responsible for releasing water during flushing. Make sure these jets are clear of any debris or blockages. 2. Resolve any clogs: If you’re experiencing frequent clogging, it’s crucial to address the issue. Take necessary steps to clear any obstructions and ensure proper water flow. 3. Adjust the water refill tube: The water refill tube is responsible for replenishing the water in the toilet tank after each flush. By adjusting its position, you can optimize the water flow and enhance the flushing power. 4. Realign or replace the flapper: The flapper is a valve that controls the water release from the tank into the toilet bowl during flushing. If it’s misaligned or worn out, it can hinder the flushing efficiency. Consider realigning or replacing it if necessary. 5. Check the water valve: Ensure that the water valve supplying water to the toilet is fully open. A partially closed valve can restrict the water flow and result in a weaker flush. 6. Adjust the float: The float regulates the water level in the tank. If it’s set too low, it can affect the flushing power. Adjust the float to ensure an optimal water level for a stronger flush. By implementing these simple steps, you can achieve a more robust and efficient toilet flush.