Welcome to our article on how to adjust the toilet bowl water level. We understand that a properly functioning toilet is essential for a comfortable and hygienic living environment. That’s why we want to provide you with the knowledge and tools to ensure that your toilet bowl water level is set just right.
Whether you’re experiencing issues with water overflow or a weak flush, adjusting the toilet bowl water level can make a significant difference in your toilet’s performance . In this article, we will guide you through the process of adjusting the toilet bowl water level using different methods, such as adjusting a ball-and-arm float or a cylinder float, and even installing a new fill valve if necessary. So, if you’re ready to take control of your toilet’s water level and optimize its performance, let’s dive in.
By following our simple steps, you can easily raise the water level in your toilet bowl without any hassle. Check out our article on “Raising Toilet Bowl Water Level” to learn more.
The most important findings at a glance
- Understanding the importance of toilet bowl water level and signs of adjustment needed.
- Tools and methods for adjusting the water level including adjusting ball-and-arm and cylinder floats, and installing a new fill valve.
- Expert tips for adjusting the water level and common mistakes to avoid.

The Role of Toilet Bowl Water Level
The Significance of Toilet Bowl Water Level In the realm of bathroom etiquette, the water level in your toilet bowl holds far more importance than one might initially perceive. Its influence on your overall bathroom experience is nothing short of profound. When the water level is inadequately low, the feeble flushes demand multiple attempts, leading to frustration and wasted time.
Conversely, if the water level is excessively high, flushing becomes a futile endeavor, squandering precious water resources. Moreover, the water level plays a pivotal role in maintaining the pristine condition of your toilet bowl. An appropriate water level ensures that waste is swiftly carried away, thwarting the emergence of unpleasant odors and unsightly stains.
Additionally, it aids in keeping the bowl clean between routine cleanings, alleviating the burden of frequent maintenance. Furthermore, adjusting the water level can have a positive impact on both the environment and your finances. By utilizing the precise amount of water required for each flush, you actively contribute to the noble cause of water conservation .
Consequently, this prudent choice not only benefits our fragile ecosystem but also results in reduced water bills . Hence, when confronted with an irregularity in your toilet bowl water level, bear in mind its profound implications on flushing efficiency, cleanliness, and our shared responsibility to conserve water. Striving to maintain an optimal water level guarantees an enhanced and eco-friendly bathroom experience for all.
Signs That Your Toilet Bowl Water Level Needs Adjustment
When your toilet bowl’s water level deviates from the norm, whether it’s too high or too low, it’s a clear indicator that some adjustments are in order. Such imbalances can greatly affect the flushing efficacy and overall cleanliness of the bowl. A low water level may lead to inadequate cleaning, while a high level can result in messy overflow and unnecessary wastage.
Additionally, weak or irregular flushing is another telltale sign of an incorrect water level. To rectify these issues, it is imperative to make the necessary adjustments to ensure optimal flushing efficiency, a pristine bowl, and responsible water conservation.

Are you tired of dealing with low toilet water levels? Learn an easy fix for this common problem in our informative video tutorial. #toiletrepair #DIY
Identifying a Ball-and-Arm Float
In the vast realm of toilet engineering , there exist ancient relics of a bygone era – the ball-and-arm floats. These archaic contraptions, easily distinguished by their peculiar shape, come in two distinct forms: the venerable ballcock and the innovative fill valve with a float arm. The ballcock, a stalwart of the old guard, boasts a hollow ball connected to a metal or plastic arm.
With each surge of water within the tank, the ball gracefully ascends, diligently halting the flow once the desired level is achieved. Alas, this float is not without its faults. A worn-out ball, a corroded or bent arm, or a faulty valve seat can plague its operation.
Thus, diligent upkeep and regular cleaning are imperative for its seamless functionality. In contrast, the fill valve with a float arm emerges as a beacon of modernity in the realm of toilet technology. Sporting a cylindrical valve and a float arm, it stands resilient against the perils that afflict its predecessor.
Nevertheless, it too is not immune to the challenges that lie in wait. A stuck or misaligned float arm, a compromised valve seal, or the accumulation of detritus can hinder its flawless performance. Thus, regular maintenance, meticulous cleaning, and vigilant inspections are paramount to ensure optimal efficiency.
To preserve the delicate equilibrium of a ball-and-arm float, one must embark on a pilgrimage of cleanliness, purging the float and arm of any impurities that dare impede their harmonious dance. Additionally, the valve seat must be scrutinized, for any worn-out components must be swiftly replaced to avert leaks and guarantee a steady flow. Armed with knowledge of the diverse species of ball-and-arm floats, their common afflictions, and the sacred rituals of maintenance , one can ascend to the throne of toilet mastery.
If you’re struggling with a low water level in your toilet bowl, check out our article “How to Raise the Water Level in Your Toilet Bowl” for easy tips and tricks to fix the problem.
Steps to Adjust a Ball-and-Arm Float
To achieve the perfect water level in your toilet bowl, simply follow these easy steps. Begin by aligning the arm and ball to ensure that the arm is parallel to the water surface and that the ball is centered in the tank. Then, use the screw on the ballcock to adjust the water level.
Turn it clockwise to raise the level or counterclockwise to lower it. After each adjustment, test the water level to ensure it’s just right. Remember, the water level should be approximately 1 inch below the top of the overflow tube.
This will guarantee an efficient flush without wasting any water. By following these simple instructions, you’ll be able to effortlessly adjust the ball-and-arm float in your toilet. Test the water level and make minor adjustments as needed to avoid any potential issues.

Adjusting the Toilet Bowl Water Level: Signs and Solutions for Proper Flushing
- The water level in a toilet bowl is important for proper functioning and efficient flushing. If the water level is too low, it may not be able to effectively remove waste. On the other hand, if the water level is too high, it can lead to frequent clogs and water wastage.
- One sign that your toilet bowl water level needs adjustment is if you notice weak or incomplete flushes. This could indicate that the water level is too low and not providing enough force to effectively flush the waste.
- Another sign to look out for is if you hear a constant running sound from your toilet tank. This could mean that the water level is too high and water is constantly overflowing into the bowl.
Identifying a Cylinder Float
The malfunctioning of a cylinder float in your toilet can lead to various issues. One telltale sign is an inconsistent water level in the bowl, which can be either too high or too low. Another indication is weak or inconsistent flushing power.
To properly maintain the cylinder float, it is essential to regularly check the water level in the bowl and make any necessary adjustments. Ensure that the float arm is properly aligned and not bent or damaged. Additionally, it is important to clean the float and its surrounding components to prevent any buildup or debris that could hinder its operation.
Regularly checking the water level in the toilet bowl is crucial for the proper functioning of the cylinder float. This proactive approach helps prevent potential problems from worsening and causing further damage. By promptly addressing any issues, you can ensure that your cylinder float remains in good working condition and avoid any future headaches.
If you’re having trouble with the water level in your toilet bowl, check out our article on how to adjust the water level in a toilet bowl for easy and effective solutions.
Steps to Adjust a Cylinder Float
Start by taking a moment to ensure optimal performance of your toilet. Begin by assessing the water level in the bowl, using it as your baseline. Then, delicately manipulate the float arm, gently bending it to elevate or diminish the water level.
Raising the arm will lift the water, while lowering it will reduce the amount. Once the adjustment is made, put it to the test by flushing the toilet. If it deviates from your desired level, make further tweaks until you achieve perfection.
Remember, the precision of the cylinder float adjustment is vital in upholding the ideal water level in your toilet bowl. By following these steps, you can guarantee a highly efficient and effective toilet experience.
By following the steps in our detailed guide on how to adjust water level in toilet bowl , you’ll be able to easily fix any issues and ensure optimal flushing performance.
How to Adjust the Water Level in Your Toilet Bowl
- Identify the type of float in your toilet bowl (ball-and-arm float or cylinder float).
- For a ball-and-arm float:
- Locate the adjustment screw on the float arm.
- Turn the adjustment screw clockwise to raise the water level or counterclockwise to lower it.
- Flush the toilet and check if the water level is adjusted to your desired level.
When to Install a New Fill Valve
In the realm of the porcelain throne, the delicate balance of water is a vital force. Yet, when the waters rise or recede beyond their designated bounds, chaos ensues. The culprit?
A wayward fill valve, responsible for not only the water level, but also the mighty flush and the purifying cleanse. To ascertain if this elusive valve is the cause of your woes, venture forth and inspect the water level, seeking telltale signs of leaks or seepage. Fear not, for the installation of a new fill valve holds the promise of restoring equilibrium, granting your toilet the power to flush with efficiency once more.
Steps to Install a New Fill Valve
Embarking on the task of replacing a fill valve in your toilet demands the proper equipment. Here’s a concise list of what you’ll require:
1. Adjustable wrench: This trusty tool will assist in loosening and tightening nuts and bolts.
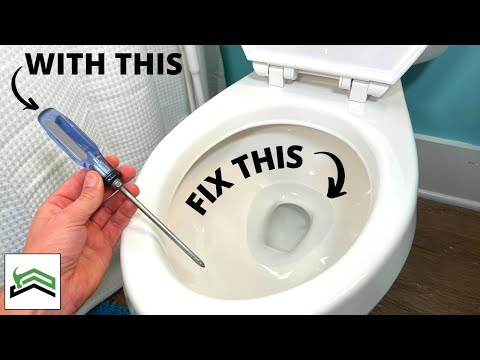
2. Screwdriver: Depending on the type of fill valve, either a flathead or Phillips screwdriver is necessary to remove screws and secure the new valve.
3. Bucket or towel: Keep one nearby to catch any water spills during the replacement process. Now, let’s delve into the step-by-step process of removing the old fill valve:
1. Turn off the water supply: Rotate the shut-off valve near the toilet base in a clockwise direction to halt the flow of water.
2. Empty the tank: Flush the toilet to drain the tank and eliminate any remaining water.
3. Disconnect the water supply line: Using an adjustable wrench, loosen the nut that connects the line to the fill valve.
4. Remove the old fill valve: Depending on the type of valve, unscrew or disconnect it from the overflow tube. To ensure a watertight seal, adhere to the following steps when installing the new fill valve:
1. Insert the new fill valve: Place it accurately into the hole at the bottom of the tank.
2. Secure the valve : Employ a screwdriver to tighten any screws or nuts that hold the valve in position.
3. Reconnect the water supply line: Utilizing an adjustable wrench, tighten the nut that connects the line to the new valve. By diligently following these steps and utilizing the appropriate tools, you can successfully replace your toilet’s fill valve without encountering any water leakage.

Comparison of Toilet Water Level Adjustment Methods – Tabelle
| Adjustment Method | Description | Pros | Cons |
|---|---|---|---|
| Ball-and-Arm Float | A traditional method that uses a floating ball attached to an arm to control the water level in the toilet bowl. |
|
|
| Cylinder Float | A newer design that uses a cylindrical float to regulate the water level in the toilet bowl. |
|
|
| Fill Valve Installation | Replacing the existing fill valve with a new one to achieve the desired water level. |
|
|
| Water Saving Devices | Installing water-saving devices like adjustable flapper valves or dual flush mechanisms to reduce water consumption. |
|
|
1/4 Expert Tips for Adjusting Toilet Bowl Water Level
Achieving efficient flushing in your toilet bowl requires careful adjustment of the water level. Here are some expert tips to help you achieve the perfect balance. To start, utilize a water level gauge to accurately measure the water level in your toilet bowl.
This invaluable tool ensures that the water is set at the ideal height for optimal flushing efficiency. Regularly inspect and clean the fill valve to prevent any accumulation of debris or minerals. These build-ups can disrupt the water level in the bowl, leading to potential malfunctions.
By cleaning the fill valve, you guarantee a consistent water level. Don’t forget to adjust the refill tube as well. This tube is responsible for refilling the tank after each flush, and if it’s not adjusted correctly, it can result in incorrect water levels in the bowl.
Make small adjustments as necessary to maintain the desired water level. By following these expert tips, you can effortlessly adjust the water level in your toilet bowl to ensure maximum flushing efficiency. Utilize a water level gauge, regularly clean the fill valve, and make necessary adjustments to the refill tube.
With these steps, you’ll have a toilet that not only functions flawlessly but also meets your every need.
If you’re struggling with the water level in your toilet, check out this helpful article “How to Adjust Water Level in Toilet” to learn how to fix the issue and ensure a properly functioning toilet.
2/4 Common Mistakes to Avoid When Adjusting Toilet Bowl Water Level
When it comes to adjusting the water level in your toilet bowl, there are a few missteps that should be avoided at all costs. First and foremost, it is imperative to ensure that the ball and arm are aligned properly in order to achieve an accurate measurement. By doing so, you will be able to set the water level correctly and prevent any potential flushing issues from arising.
Another crucial mistake to avoid is neglecting to test the water level after each adjustment. It is essential to check and confirm that the water is at the desired height in order to maintain optimal flushing power and ensure the cleanliness of the bowl. Last but certainly not least, selecting the appropriate fill valve is of utmost importance.
It is vital to choose a fill valve that is compatible with your specific toilet and has the capability to effectively control the water level. This not only guarantees the proper functioning of your toilet but also promotes efficient water usage. By steering clear of these all-too-common mistakes, you will be able to successfully adjust the water level in your toilet bowl and uphold a clean and efficient flushing system.
If you’re wondering how to increase the water level in your toilet bowl, check out our article on how to increase water level in toilet bowl for some helpful tips and tricks.


3/4 References
Ensuring your toilet remains leak-free requires regular maintenance of the fill valve. By inspecting and cleaning it regularly, you can prevent any potential issues that may result in leaks. Another essential aspect of toilet maintenance is adjusting the water level in the bowl.
Utilizing a water level gauge will provide accurate measurements, helping you determine the optimal water level for efficient flushing and cleanliness. In addition to the fill valve and water level gauge, don’t forget the importance of adjusting the refill tube. This simple step helps regulate the amount of water that enters the bowl after each flush, preventing overflow or weak flushing.
By prioritizing proper maintenance of the fill valve, utilizing a water level gauge, and adjusting the refill tube, you can achieve the ideal water level in your toilet bowl. Follow these tips to ensure your toilet functions smoothly while conserving water.
4/4 CONCLUSION
In conclusion, understanding why toilet bowl water level matters is crucial for maintaining proper functionality and efficiency in your bathroom. By adjusting the water level, you can prevent issues such as clogging , overflowing , and inefficient flushing. This article has provided step-by-step instructions on how to adjust a ball-and-arm float or a cylinder float, as well as how to install a new fill valve if necessary.
We have also included expert tips and highlighted common mistakes to avoid. By following these guidelines, you can ensure that your toilet bowl water level is optimized for optimal performance. For further information and helpful articles on plumbing and home maintenance, we recommend exploring our other resources on related topics.
FAQ
How do you adjust the flush amount on a toilet?
To adjust the water fill level in your toilet tank, follow these steps. First, make sure the tank is empty. Then, gently bend the float rod upwards to increase the water level or downwards to lower it. Remember to be careful while handling the delicate metal float rod. Once you’ve made the adjustment, flush the toilet and observe the water level to ensure it meets your desired fill level.
How much water should be in toilet bowl after flushing?
The water level in a toilet bowl is typically halfway full. It is important for the water to be above the P trap drain as this helps create a seal and suction. This seal prevents sewer gases from entering your house through the toilet. So, when you flush the toilet, the suction helps maintain this barrier. It’s crucial to have this barrier in place to ensure the hygiene and safety of your home’s plumbing system.