Are you dealing with a cracked toilet tank and wondering how to perform toilet tank crack repair? Look no further, as we have got you covered! In this article, we will provide you with a step-by-step guide on toilet tank crack repair, as well as tips on identifying and preventing them.
Whether you are a DIY enthusiast or simply want to save some money by avoiding a costly replacement, this article is perfect for you. Toilet tank crack repair can be a common issue, but it should not be ignored due to the potential implications it can have on your bathroom. Did you know that a small crack in your toilet tank can lead to water leakage and even structural damage to your bathroom?
So, let’s dive into this guide and learn how to perform toilet tank crack repair and keep your bathroom in top shape!
If you’re dealing with a cracked toilet tank, check out our article “How to Repair a Cracked Toilet Tank” to learn how to fix it and avoid any future plumbing mishaps.
Quick check: the highlights of the article
- Understanding Toilet Tank Cracks: – Causes of cracks and implications of ignoring them – Identifying cracks in the toilet tank – Preparation for repair and essential tools/materials
- Step-by-Step Guide to Fixing a Cracked Toilet Tank: – Turning off and drying out the water – Selecting and applying a sealer – Smoothing and drying out the sealer, and testing the repair
- When to Consider Replacement Over Repair and Preventing Future Toilet Tank Cracks

Causes of Toilet Tank Cracks
The fragility of a toilet tank can be attributed to a multitude of factors. Hard water deposits, excessively tight bolts, and temperature changes all contribute to its vulnerability. Over time, these deposits erode the strength of the tank, rendering it susceptible to cracks.
The strain caused by overtightened bolts creates weak points that can eventually lead to fractures. Additionally, the constant expansion and contraction caused by temperature fluctuations can cause the material to crack. To prevent any consequential water leakage and damage, it is imperative to take these factors into consideration.
Engaging in regular maintenance, such as inspecting and cleaning the tank, will help mitigate these risks and extend the lifespan of your precious toilet tank.
Implications of Ignoring Cracks
Neglecting cracks in your toilet tank can spell disaster for both your home and your finances. The potential for water leakage and subsequent damage to surrounding areas cannot be underestimated. These cracks allow water to seep out, resulting in dampness and potential harm to your bathroom floor and walls.
The cost of repairing such damage can be exorbitant. But that’s not all. Ignoring these cracks can also lead to the growth of mold and mildew.
The leaking water creates the perfect moist environment for these fungi to flourish. Not only do they emit unpleasant odors, but they also pose health risks to you and your loved ones. Mold spores in the air can trigger allergies and respiratory issues.
Furthermore, neglecting these cracks will inevitably lead to higher water bills. With constant water leakage, your toilet is constantly refilling, even when not in use. This results in significant water wastage and a noticeable spike in your monthly bills.
It’s akin to throwing money down the drain. In conclusion, turning a blind eye to cracks in your toilet tank can have severe consequences. From water damage and mold growth to inflated water bills, the implications are substantial.
It is crucial to address any cracks promptly to prevent further damage and unnecessary expenses.
If you’re dealing with a cracked toilet, check out our article on toilet crack repair for some simple tips and solutions to fix the problem.

Spotting Hairline Cracks
Unearthing hairline fractures in your toilet tank demands a certain finesse. A trusty flashlight comes in handy, illuminating the minuscule cracks that elude the naked eye. By casting its beam across the tank, you can catch glimmers and shadows, betraying the presence of these elusive cracks.
Moreover, discolored patches or water stains encircling the crack serve as unmistakable indicators of a hairline fracture. These telltale marks signify the permeation of water, leaving behind its residue. Be sure to scrutinize the tank from every angle, as cracks may be concealed or elusive.
Take your time, conducting a thorough examination of the entire tank. By employing these techniques and remaining vigilant for signs such as discoloration and water stains, you can promptly spot hairline cracks. Swift detection is crucial in warding off further damage and potential leaks.
Arm yourself with a flashlight and shed light on those pesky cracks!
How to Easily Repair a Cracked Toilet Tank
- Turn off the water supply to the toilet tank.
- Empty the tank by flushing the toilet multiple times.
- Carefully inspect the tank for cracks, focusing on both the interior and exterior surfaces.
- If you spot any hairline cracks, mark their locations for repair.
- Gently clean the cracked areas with a mild detergent and a sponge.
- Apply a high-quality sealer specifically designed for toilet tank repair to the cracked areas.
- Smooth out the sealer and allow it to dry completely before turning the water supply back on.
Differentiating Between Bowl and Tank Cracks
When confronted with the dilemma of cracked toilet tanks, it becomes imperative to discern between cracks in the bowl and those in the tank. By closely examining the crack’s location and trajectory, one can ascertain the nature of the problem. Additionally, it is essential to remain vigilant for any signs of water leakage or deterioration within the bowl, such as discoloration or water stains.
To pinpoint the root cause of the issue, a thorough examination of the tank’s exterior surface is necessary to identify any cracks or damage. This examination will aid in determining whether the problem lies within the tank. It is crucial to meticulously inspect both the bowl and the tank to gather all the relevant information required for the repair process.
It cannot be stressed enough that addressing these cracks promptly is of utmost importance to prevent further harm. Neglecting them can result in water leakage, the growth of mold, and soaring water bills. Therefore, it is vital to dedicate the time and effort needed to carefully scrutinize your toilet for cracks and take appropriate action to rectify them.

Essential Tools and Materials for Crack Repair
In order to mend a cracked toilet tank, it is imperative to have the appropriate tools and materials at hand. Opt for epoxy or acrylic-based sealers, as they offer a sturdy and resilient bond. Prior to applying the sealer, use a putty knife or scraper to eliminate any loose material and properly prepare the surface.
It is essential to ensure that the area is both clean and dry before proceeding with the repair. By adhering to these fundamental steps, you can successfully rectify the crack and guarantee a repair that will endure the test of time.
Causes of Toilet Tank Cracks – Tabelle
| Cause of Toilet Tank Cracks | Description |
|---|---|
| Thermal Shock | Sudden extreme temperature changes, such as pouring boiling water into a cold toilet tank, can cause cracks. The temperature difference causes the tank to expand or contract rapidly, leading to stress and potential cracking. |
| Impact Damage | Dropping heavy objects on or accidentally hitting the toilet tank can result in cracks. The impact can weaken the structural integrity of the tank, causing it to crack. |
| Age and Wear | Over time, the materials of the toilet tank can deteriorate, making it more susceptible to cracking. Constant exposure to water, chemicals, and regular use can weaken the tank’s structure, leading to cracks. |
| Incorrect Installation | Poor installation techniques, such as overtightening bolts, uneven pressure, or using incompatible materials, can result in cracks. Uneven pressure during installation can create stress points, making the tank more prone to cracking. |
| Water Pressure Issues | Extremely high water pressure or water hammer, which occurs when water flow is suddenly stopped or redirected, can cause stress on the tank, leading to cracks. Proper water pressure regulation and the installation of pressure-reducing valves can help prevent this. |
| Chemical Corrosion | Harsh chemicals or cleaning agents, such as bleach or abrasive cleaners, can corrode the tank over time. Chemical corrosion weakens the tank’s structure, making it more susceptible to cracks. It is important to use gentle, non-corrosive cleaning products specifically designed for toilet maintenance. |
| Manufacturing Defects | Occasionally, manufacturing defects in the toilet tank can result in cracks even with normal use. These defects may include flaws in the material or structural weaknesses. Regular inspections and quality control during manufacturing can help minimize such defects. |
Steps to Prepare Your Work Area
To ensure a successful repair and prolong the life of your toilet tank, start by clearing the work area. Remove any debris and objects, creating a clean and clutter-free space. Proper ventilation is essential, so open windows or use a fan to circulate air and minimize fumes.
Protect surfaces with a drop cloth or plastic sheet to prevent spills and damage. These simple steps will create a safe and organized environment for your toilet tank repair .

Turning Off and Drying Out the Water
To successfully repair a crack in your toilet tank, it is imperative to first turn off the water and ensure the tank is dry. Start by locating the main water supply valve and turning it clockwise to stop the flow of water. Next, use a sponge or towel to absorb any remaining water in the tank, ensuring every nook and cranny is dry.
Drying the tank is crucial as a moist surface will hinder the sealer from adhering properly, impacting the effectiveness of your repair. Once the water is off and the tank is dry, you can proceed to fix the crack. Remember, a dry surface and a tightly sealed crack are vital for a repair that will stand the test of time.
Take your time, follow the steps diligently, and bid farewell to that unsightly crack in your toilet tank.
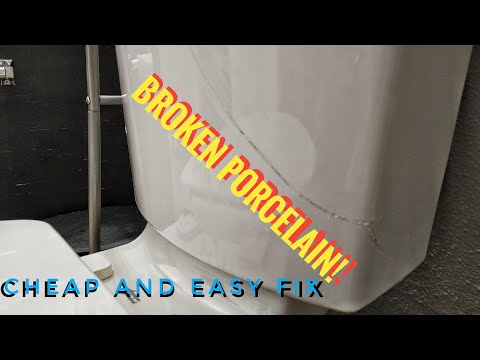
Toilet tank crack repair can be a hassle, but this video has a simple and affordable fix. Learn how to mend a cracked toilet without leaks or the need for a plumber. Find out the easy steps to tackle this DIY project and save money in the process.
Selecting and Applying a Sealer
Selecting the appropriate sealer is of utmost importance when it comes to rectifying a fractured toilet tank. Opt for an epoxy or acrylic-based sealer for minor cracks. With the aid of a putty knife or scraper, apply the sealer uniformly and flawlessly, ensuring that the entire crack is covered.
Allow sufficient time for the sealer to dry and set before examining the repair. To detect any leaks or cracks, apply pressure and employ a dye or coloring agent. Perform a water flow test to ascertain the absence of additional leaks.
For optimal outcomes, adhere to the guidelines provided by the manufacturer.
Smoothing and Drying Out the Sealer
In the art of fixing a cracked toilet tank, there are three crucial steps to follow: carefully smoothing and drying the sealer, gently sanding any rough patches, and ensuring the area is thoroughly dry before moving forward. By faithfully carrying out these steps, you significantly enhance the likelihood of achieving a durable and effective repair, shielding yourself from any future leaks or harm. It is worth emphasizing that patience plays a vital role throughout this entire process.
How to prevent and repair toilet tank cracks: A comprehensive guide
- Toilet tank cracks can be caused by a variety of factors, including age, impact, and temperature fluctuations.
- Ignoring cracks in your toilet tank can lead to water leakage, which can cause damage to your bathroom floor and walls.
- One way to identify cracks in your toilet tank is by spotting hairline cracks, which may be difficult to see but can still cause leaks.
Testing the Repair
Once you’ve fixed a cracked toilet tank, it’s crucial to ensure that your repair is effective. There are a few simple ways to test it out. First, gently apply pressure to the repaired area and check for any signs of water leaks or moisture.
Another option is to use a dye or coloring agent on the repaired spot and observe if it spreads or stains the surrounding areas. This will help identify any remaining cracks or weak points. Lastly, flush the toilet multiple times and observe if there are any signs of water leakage or if the repair holds up under pressure.
By conducting these tests, you can have confidence in the success of your repair and avoid any hidden issues. Remember, thorough testing is vital for maintaining the integrity of your toilet tank and preventing future damage.

1/3 When to Consider Replacement Over Repair
Deciding whether to repair or replace your toilet tank requires careful consideration. Although some cracks can be fixed, there are instances where replacement is the wiser choice. Firstly, assess the severity of the cracks.
If they span a large area of the tank, repairing them may not be effective. In these situations, investing in a new tank is a more practical solution. Secondly, take note of how frequently cracks reoccur despite previous repairs.
This could indicate underlying structural problems. In such cases, it’s best to opt for replacement rather than endless repairs. Lastly, consider the age and deterioration of the tank.
As materials weaken over time, the tank becomes more susceptible to cracks. If the tank is significantly deteriorated, it’s a clear indication that replacement is necessary. While repairs are often the initial choice, evaluating the extent of cracks, recurrence of issues, and the age of the tank will help you make an informed decision.
Bid farewell to your old tank and welcome a brand new one.
If you’re looking for advice on which mini split brands to avoid, check out our article “Mini Split Brands to Avoid” for some helpful insights.

2/3 Preventing Future Toilet Tank Cracks
A Guide to Preserving Your Toilet Tank’s Integrity In order to safeguard your toilet tank from unsightly cracks, it is essential to adopt a regimen of routine maintenance and diligent inspection. By adhering to a few straightforward steps, you can ensure its endurance and spare yourself the burden of costly repairs in the future. To begin, develop the habit of regularly examining your toilet tank.
Vigilantly search for any indications of deterioration, such as minute fractures or alterations in coloration. Detecting these problems early on will thwart their progression and prevent further harm from befalling your tank. Additionally, exercise caution when selecting cleaning agents.
Harsh chemicals possess the ability to weaken the tank, rendering it more susceptible to cracks. Instead, opt for non-abrasive cleansers that are explicitly formulated for use on toilets. During the installation process, exercise due care in correctly tightening the bolts.
Excessive force can strain the tank, thereby resulting in cracks. Comply with the manufacturer’s instructions and employ the appropriate tools to ensure a secure and steadfast installation. By adhering to these preventative measures, you will safeguard the structural integrity of your toilet tank and significantly diminish the likelihood of cracks.
Regular inspections, the choice of gentle cleaning products, and adherence to proper installation practices will undoubtedly contribute to the longevity of your toilet tank, sparing you from the expense of future repairs.

3/3 CONCLUSION
In conclusion, understanding toilet tank cracks is essential for homeowners in order to properly identify and address any issues. By recognizing the causes of cracks and the implications of ignoring them, individuals can take the necessary steps to repair and prevent future damage. This article provides a comprehensive guide to identifying and fixing toilet tank cracks, including the tools and materials needed for repair and step-by-step instructions.
However, it is important to know when replacement may be necessary instead of attempting a repair. By following the guidelines outlined in this article, homeowners can effectively address toilet tank cracks and maintain the functionality and longevity of their plumbing system. For more helpful articles on plumbing maintenance and repair , we recommend exploring our other resources on common household issues.
FAQ
Can a cracked toilet tank be repaired?
If you notice small cracks on the surface of the tank, don’t worry, these are only cosmetic and don’t need fixing. However, if you come across hairline cracks below the waterline, you’ll need to do some patching using epoxy. On the other hand, if you find larger cracks below the waterline, it’s a sign that the entire toilet needs to be replaced.
How do you fix a crack in a toilet reservoir?
Here’s a simple guide on how to fix a cracked toilet tank by yourself. 1. Start by draining the water from the toilet tank. 2. Use a cloth or towel to thoroughly dry out the tank. 3. Fill the crack in the tank with putty or epoxy, ensuring it is completely covered. 4. Allow the epoxy to dry for a minimum of 24 hours. 5. After the drying period, carefully inspect the epoxy and tank for any visible cracks or signs of damage. 6. Finally, refill the tank with water and check for any leaks or further issues. By following these steps, you can successfully repair a cracked toilet tank on your own. Remember to be patient during the drying process to ensure a long-lasting fix.
How much does it cost to fix a cracked toilet tank?
The cost of replacing the wax ring/seal can range from $50 to $150, including labor. Additionally, the cost of replacing the tank can vary between $100 and $250. Similarly, the cost of replacing the bowl can range from $100 to $300. Lastly, replacing a pipe can cost anywhere between $100 and $1,200.
How do you fix cracked porcelain?
When fixing broken pieces, it is recommended to use a strong liquid or gel adhesive that dries clear. An excellent option is Loctite Super Glue Gel Control, which quickly forms robust bonds with porous surfaces like porcelain and sets without the need for clamping. This adhesive is specifically designed for fixing broken porcelain, making it an ideal choice. Super glues are known for their exceptional adhesive properties, making them highly effective for various repair tasks.