Are you in the process of installing a new toilet in your bathroom? If so, understanding the concept of a toilet flange rough-in is crucial for a successful installation. A toilet flange serves as a connection point between the toilet and the waste pipe, ensuring a secure and leak-free connection.
However, determining the correct rough-in dimensions for your toilet flange can be a daunting task. In this article, we will explore the importance of a toilet flange in bathroom installation and provide a comprehensive guide on measuring and installing the correct toilet flange rough-in. Whether you are a DIY enthusiast or a professional plumber, this article will equip you with the knowledge and tools necessary to tackle any toilet flange rough-in project.
So let’s dive in and discover the world of toilet flanges together. In conclusion, if you want to ensure a successful toilet installation, it is essential to understand the concept of a toilet flange rough-in and follow the correct measurements and installation process.
The most important facts in a nutshell
- The importance of a toilet flange in bathroom installation
- Understanding toilet flange rough-in dimensions and their significance
- Types of toilet flanges, how to determine the correct rough-in, and common installation mistakes to avoid.

Importance of a Toilet Flange in Bathroom Installation
In the intricate dance of bathroom construction, the toilet flange takes center stage. This unassuming hero provides the stability needed to keep the toilet grounded, preventing any unwanted wobbling or shifting. But its role goes beyond mere support.
Like a guardian, the flange forms a watertight seal between the toilet and the drain pipe, safeguarding against leaks and potential damage. And let us not forget the added bonus of enhanced comfort and safety, as the flange ensures the toilet remains steadfast in its place. Truly, a proper toilet flange is the cornerstone of a truly blissful bathroom experience.
Detailed Explanation of Toilet Flange Rough-In Dimensions
Crafting a flawless toilet installation requires meticulous attention to the rough-in dimensions of the toilet flange. These dimensions signify the crucial space between the wall and the center of the drain pipe. Precise measurements are essential for a successful installation, leaving no room for error.
To determine the rough-in dimensions, one must carefully analyze the size and shape of the toilet fixture that will be installed. Each toilet has its own unique requirements, making it imperative to select a toilet flange that aligns perfectly with your chosen fixture. Typically, the range for toilet flange rough-in dimensions falls between 10 to 14 inches.
However, it is highly recommended to consult the manufacturer’s specifications for your specific toilet model to ensure utmost accuracy in measuring. The key to achieving a proper toilet flange installation lies in the realm of accuracy. Even the slightest miscalculations can result in misalignment and potential leaks down the line.
To avoid such predicaments, devote ample time to precise measurements and double-check them before embarking on the installation journey. By comprehending the factors to consider, understanding the common dimensions, and recognizing the significance of accurate measurement, you will forge a steadfast and leak-free connection between your cherished toilet fixture and the drain pipe.

Why Understanding Toilet Flange Rough-In is Necessary
Accurate measurements of a toilet flange’s rough-in are crucial for a seamless bathroom installation. They guarantee correct alignment and prevent any misplacement or uncomfortable positioning . Additionally, understanding the rough-in measurement contributes to long-term toilet stability.
Inaccurate measurements can result in a wobbly and potentially damaging toilet. Hence, investing time in measuring and comprehending the rough-in is imperative for a stable and hassle-free installation.
Toilet Flange Rough-In Dimensions Tabelle
| Toilet Flange Rough-In Dimensions (in inches) | Description/Explanation of Each Rough-In Dimension | Recommended Toilet Flange Size for Each Rough-In Dimension | Common Toilet Models/Brands that Fit Each Rough-In Dimension | Additional Notes/Considerations for Each Rough-In Dimension |
|---|---|---|---|---|
| 10 | The distance from the finished wall to the center of the toilet flange. | 4 inches | Kohler K-3979-RA-0 Highline, American Standard 288DA114.020 H2Option | Ensure sufficient space for installation and maintenance. Measure accurately to avoid any issues. |
| 12 | The distance from the finished wall to the center of the toilet flange. | 4 inches | TOTO CST744SL#01 Drake, Gerber Plumbing GWS21502 Viper | Check for any obstructions or protrusions in the area that may affect installation. |
| 14 | The distance from the finished wall to the center of the toilet flange. | 4 inches | American Standard 270BD001.020 Cadet 3, Kohler K-3816-0 Memoirs | Consider the overall bathroom layout and available space. Ensure proper clearance from other fixtures. |
Different Materials of Toilet Flanges
In the realm of toilet flanges, a myriad of materials awaits your discerning eye, each boasting its own unique merits. Stainless steel emerges as a stalwart companion, unfazed by the relentless onslaught of moisture and impervious to the ravages of corrosion. PVC, a lightweight contender, offers ease of installation and a cost-effective allure.
With its steadfast seal and resistance to chemicals, it stands as a reliable choice. Behold the majesty of brass, strong and enduring, a beacon of fortitude in the face of heavy burdens. Yet, it too harbors a vulnerability, susceptible to the insidious grip of corrosion, demanding diligent upkeep.
In the end, your choice shall be dictated by the intricacies of your distinct prerequisites. However, let not the grandeur of your decision overshadow the paramount objective – a material that binds your toilet to the drain pipe, ensuring a resolute union devoid of any treacherous leaks.
If you’re unsure about the rough-in measurement for your toilet, check out our article on “Rough-In Measurement for Toilet” to learn how to accurately measure and ensure a proper fit for your new toilet.
Tools Needed for Measuring Toilet Flange Rough-In
In the quest for a perfectly installed toilet flange, a selection of indispensable tools becomes your faithful companions. Begin with a trusty tape measure, skillfully calculating the distance from the wall to the drain pipe’s center. This meticulous measurement ensures the precise placement of the flange.
Enlist the aid of a pencil or marker, poised and ready to etch this measurement onto the floor. This mark will serve as a steadfast reference point during the installation of the flange. But wait, the pièce de résistance is yet to come – the level!
This mighty tool holds the power to determine the flange’s destiny. With unyielding accuracy, it detects any unevenness in the floor, a crucial element for stability and the prevention of future toilet tribulations. Embrace these tools as your allies, as you venture forth to measure the rough-in dimensions of your toilet flange.
Remember, precision is paramount, so proceed with care and verify your measurements. By doing so, you ensure a seamless and steadfast connection between your toilet and the drain pipe, free from the tyranny of leaks.

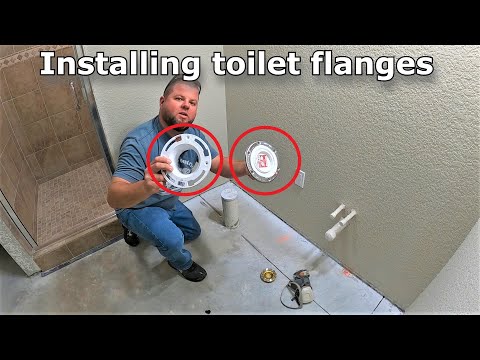
In this informative video, we delve into the world of toilet flange rough-in. Learn how to properly install a toilet flange and put the finishing touches on your bathroom flooring. Get ready to enhance your DIY skills with this step-by-step guide!
Step-by-Step Guide on Measuring Toilet Flange Rough-In
When it comes to installing your toilet flange, precision is key. Before diving into the installation process, take a moment to assess the levelness of your floor. This simple step will help you avoid any future stability issues .
Next, carefully measure the distance from the wall to the center of the drain pipe . This measurement will dictate the placement of your toilet flange. And don’t forget to mark this measurement accurately on the floor as a helpful guide during installation.
By taking the time to measure with care, you’ll ensure a seamless alignment for your toilet and eliminate any potential hiccups along the way. Remember, a secure and properly aligned toilet flange is essential for a leak-free and wobble-free connection to the drain pipe. So grab your tools and embark on the journey of measuring for that flawless toilet flange rough-in.
How to Avoid These Mistakes
In order to achieve a seamless installation, it is crucial to take certain steps when determining the rough-in for your toilet flange. To guarantee accuracy, it is recommended to verify measurements with another person to catch any potential errors. Additionally, take into account any obstacles in the vicinity of the toilet, such as pipes or cabinets, as they may impact the positioning of the flange.
If you encounter any uncertainties or difficulties, seeking guidance from a professional plumber is highly advisable. By adhering to these guidelines, you can steer clear of common mistakes and ensure a hassle-free installation process.
Installing a Toilet Flange: A Step-by-Step Guide
- Measure the distance from the wall to the center of the drain pipe to determine the rough-in dimension.
- Select the correct size and type of toilet flange based on the rough-in dimension.
- Place the toilet flange over the drain pipe and ensure it is centered and level.
- Secure the toilet flange to the floor using screws or bolts, making sure it is firmly attached.
Required Tools and Materials
The art of toilet flange installation requires more than just a steady hand. It demands the mastery of the right tools and materials, a delicate dance between form and function. In this intricate ritual, the choice of installation kit becomes paramount, as it holds the key to unlocking the plumbing needs of your sacred space.
Each kit, a bespoke creation, crafted to fit a specific purpose. Screws or bolts, the silent sentinels, stand ready to secure the flange to the drain pipe. And there, nestled among them, lies the wax ring, a humble hero, its mission to create a watertight seal, an impenetrable fortress against the relentless tides.
But beware, dear reader, for not all wax rings are created equal. They come in various sizes and thicknesses, each one a puzzle piece waiting to be matched with the dimensions of your flange and drain pipe. Choose wisely, for the fate of your bathroom rests upon that fateful union.
A well-sealed flange, a guardian of efficiency , banishes the threat of leaks and keeps the toilet’s heart beating strong. Yet, even with the perfect kit and a harmonious wax ring, the path to perfection is not yet complete. A final touch, a whisper of wisdom , awaits you.
A waterproof sealant, a shield of invincibility, must be applied around the base of the flange. This added layer of protection, a bulwark against the forces of nature, ensures that leaks and water damage shall never darken your doorstep. Embrace this sacred ritual, dear reader, for it holds the key to a smooth installation, a symphony of craftsmanship.
Take the time to select the right kit, the perfect wax ring, and wield the waterproof sealant with care. In doing so, you shall forge a bond that transcends time, a bond that safeguards the sanctity of your bathroom fixtures, keeping them in pristine condition for ages to come.
If you’re in need of a toilet with a 13-inch rough-in, check out our article on the best options available to help you make the right choice for your bathroom.

Step-by-Step Toilet Flange Installation Guide
Installing a toilet properly requires careful alignment of the toilet flange and drain pipe. Begin by centering and leveling the flange over the pipe, then secure it to the floor using the appropriate screws or bolts. Tighten them evenly to prevent any movement.
Apply a generous amount of wax ring on top of the flange to create a watertight seal. Gently lower the toilet bowl onto the wax ring, aligning it with the flange, and apply gentle pressure for a tight seal. Finally, secure the toilet bowl to the floor following the manufacturer’s instructions.
With proper alignment, secure installation, and ample wax ring, your toilet will be stable and leak-free.

Leaky Toilet Flange
Dealing with a leaky toilet flange can be an exasperating ordeal. It presents itself in various forms: a loose or damaged wax ring, a cracked or broken flange, or an improperly installed flange. Indications of a leaky flange are unmistakable: water gathering around the toilet’s base, an unpleasant stench permeating the bathroom, or a disconcerting gurgling noise during each flush.
To rectify this vexing issue, one must first shut off the water supply, then proceed to remove the toilet. Thoroughly examine and replace the wax ring if necessary, and if the flange is found to be cracked or broken, it must be promptly replaced. Finally, reattach the toilet securely.
Though attending to a leaky flange may not be the most enjoyable task, adhering to these steps will aid in its repair and safeguard against further damage .
If you’re dealing with a toilet flange that’s too high, check out our article on how to fix a high toilet flange for some helpful tips and solutions.

Incorrect Toilet Flange Height
Achieving the perfect height for a toilet flange is crucial for a secure and functional installation. A poorly positioned flange can result in a wobbly or unstable toilet, while one that is too low can lead to leaks and plumbing problems. The consequences of an incorrectly positioned flange are numerous.
They range from an uneven toilet seat and leakage around the base to difficulties in aligning the bowl with the flange. These issues not only affect the toilet’s performance but can also cause water damage and costly repairs if left unaddressed. To address the flange height effectively, there are a few options available.
One option is to use a flange extender, which is a ring made of plastic or metal that raises the existing flange. Alternatively, you can replace the old flange with a new one that has the correct height. To ensure a proper installation and avoid complications, it is advisable to consult a professional plumber or follow the manufacturer’s guidelines.
By understanding the implications of an incorrect flange height and knowing how to make adjustments , you can ensure a stable and leak-free toilet installation that will stand the test of time. So, the next time you install a toilet flange, remember to prioritize its height for a hassle-free bathroom experience.
Everything You Need to Know about Toilet Flange Rough-In
- A toilet flange is an essential component of a bathroom installation, as it connects the toilet to the sewage pipe.
- Understanding the rough-in dimensions of a toilet flange is crucial for proper installation.
- There are different types of toilet flanges available, including PVC, cast iron, and stainless steel.
- Measuring the correct toilet flange rough-in requires a few simple tools, such as a tape measure and level.
- Common mistakes when determining toilet flange rough-in include measuring from the wrong reference point or not accounting for baseboard thickness.
- Installing a toilet flange involves securing it to the floor and ensuring proper alignment with the toilet’s waste outlet.
- Problems related to toilet flange rough-in, such as leaks, incorrect height, or misalignment, can be fixed by adjusting the flange or using a repair kit.
- Professional tips for a successful toilet flange rough-in include using a wax ring for a proper seal and checking for any leaks before finalizing the installation.
Improper Toilet Flange Alignment
The Importance of Proper Toilet Flange Alignment In the realm of toilet installation, there is an often overlooked yet vital aspect that deserves our attention – proper toilet flange alignment. This seemingly mundane task holds the key to ensuring the optimal performance and stability of your beloved porcelain throne. Why does alignment matter, you may ask?
Well, let me enlighten you. A misaligned flange can give rise to a plethora of issues that can wreak havoc on your toilet’s functionality. Among these perils, leaks take center stage.
When the flange fails to align perfectly with the drain pipe, it creates gaps and uneven surfaces, allowing water to seep out. This not only leads to water damage but also opens the door for mold growth and unpleasant odors, turning your once serene bathroom into a damp and foul-smelling nightmare. But wait, there’s more.
Improper alignment also affects the stability of your toilet. Picture this: you sit down, ready to relieve yourself, only to find that your throne wobbles and shifts beneath you. Not only is this discomforting, but it can also be downright dangerous.
Imagine the plight of elderly or disabled individuals who lean on their toilet for support. A shaky foundation is the last thing they need. Thankfully, all hope is not lost.
Restoring proper alignment is within your grasp. Follow these simple steps, and you shall triumph over misalignment. First and foremost, ensure that the flange is centered and harmoniously aligned with the drain pipe.
Employ the trusty aid of a level to detect any signs of unevenness, and make the necessary adjustments accordingly. Additionally, do not forget to securely fasten the flange to the floor using the appropriate screws or bolts. By addressing alignment issues head-on, you pave the way for a harmonious relationship between you and your toilet.
Say goodbye to leaks, instability, and their associated woes. However, if the task seems daunting or unfamiliar, fear not. Seek the guidance of a professional plumber who shall navigate these treacherous waters on your behalf.
Safety and peace of mind await you.

1/2 Professional Tips for a Successful Toilet Flange Rough-In
When it comes to achieving a successful toilet flange rough-in, there are a few key tips to bear in mind. First and foremost, it’s crucial to check for any floor leveling issues prior to installation. Uneven floors can spell trouble, leading to instability and potential leaks.
By ensuring a level floor, you’ll establish a firm and secure foundation for your toilet flange. Next, it’s imperative to securely fasten the flange using the appropriate screws or bolts. This step is essential in order to prevent any unwanted movement or wobbling of the toilet fixture.
It’s important to carefully follow the manufacturer’s instructions for the specific type of flange you’re working with, as different flanges may necessitate different attachment methods. Lastly, don’t forget to apply a waterproof sealant around the base of the flange. This step is crucial for protecting against leaks and potential water damage.
Be sure to select a sealant that is compatible with the material of your flange and carefully adhere to the manufacturer’s instructions for proper application. By diligently following these tips, you’ll be able to achieve a stable toilet flange rough-in that effectively prevents leaks and provides a sturdy foundation for your bathroom installation.
2/2 CONCLUSION
In conclusion, understanding the concept of toilet flange rough-in is crucial for a successful bathroom installation . This article has provided a comprehensive explanation of toilet flange rough-in dimensions and the importance of getting them right. We have also discussed the different types of toilet flanges and how to determine the correct rough-in measurement.
Additionally, we have highlighted common mistakes to avoid and provided a step-by-step guide for toilet flange installation. Furthermore, we addressed potential problems related to toilet flange rough-in and how to fix them. Overall, this article has equipped readers with the knowledge and tools needed to tackle toilet flange rough-in with confidence.
For more helpful articles on bathroom installations and plumbing, we recommend exploring our other resources on related topics.