Are you tired of dealing with a loose faucet handle no set screw that just won’t stay in place? If so, you’re not alone. Many homeowners encounter this frustrating issue, and it can be a nuisance to deal with.
In this article, we will discuss how to identify a loose faucet handle no set screw, understand the mechanism behind handles without a set screw, troubleshoot and tighten them, and even provide preventive measures to avoid future issues. Whether you’re a DIY enthusiast or simply looking to save some money on repairs, this article is for you. So let’s dive in and put an end to that pesky loose faucet handle no set screw once and for all.
The most important facts in a nutshell
- Signs of a loose faucet handle and reasons behind it.
- Understanding the mechanism of faucet handles without a set screw.
- Troubleshooting steps to tighten a loose faucet handle with no set screw and preventive measures to avoid it in the future.

1/8 Signs of a Loose Faucet Handle
If your faucet starts to exhibit peculiar behavior when you turn it on or off, chances are that the culprit is a loose handle . This is a common issue faced by homeowners, but the good news is that it’s a simple problem to fix. One telltale sign of a loose handle is when it wiggles or moves while you’re trying to adjust the water flow.
This can be quite frustrating, as it hinders your ability to control both the temperature and the rate of water flow. Additionally, keep an eye out for any water leaking from the base of the handle. Not only does this result in water wastage, but it can also cause damage to your countertop or sink.
If you notice any of these signs, it’s absolutely imperative to promptly tighten the handle.
If you’re wondering how to adjust the water level in your toilet tank, check out our article “Adjust Toilet Tank Water Level” for easy steps and tips on how to do it properly.
2/8 Reasons for a Loose Faucet Handle
Dealing with a loose faucet handle can be quite a nuisance, but fear not! By understanding the underlying causes, you’ll be able to tackle the issue head-on. Let’s explore some common reasons why a handle may become loose.
Firstly, worn-out or damaged internal parts are often the culprits behind a loose handle. Over time, the constant use of the faucet can cause these parts to wear down, resulting in a wobbly handle. This applies to all types of faucet handles, so keep that in mind.
Secondly, improper installation can also lead to a loose handle. If the handle wasn’t tightened securely during the installation process, it may gradually loosen over time. So, always make sure to give it a good tightening during installation to avoid future headaches.
Lastly, age and wear and tear can’t be underestimated. Just like any other object, faucets deteriorate with time. Exposure to water, chemicals, and daily use can gradually weaken the handle, causing it to become less effective.
To fix a loose faucet handle, the first step is to identify the cause. Whether it’s worn-out parts, improper installation, or general wear and tear, understanding the root of the problem is crucial. Once you’ve pinpointed the cause, you can take the necessary steps to tighten the handle and ensure a trouble-free future.
If you’re looking for information on an old Moen Roman tub faucet, check out our article “Old Moen Roman Tub Faucet” for everything you need to know about its features, maintenance, and possible replacements.

Fixing a Loose Faucet Handle: Step-by-Step Guide for No Set Screw Handles
- Turn off the water supply to the faucet.
- Locate the small hole or cap on the handle.
- Use a flathead screwdriver or a small Allen wrench to remove the cap.
- Gently pry off the handle to reveal the valve stem.
- Use pliers to tighten the packing nut on the valve stem.
- Reassemble the handle by sliding it back onto the valve stem.
- Tighten the cap back onto the handle.
3/8 Types of Faucets Handles and Their Mechanism
In the realm of faucet handles , a world of possibilities awaits. Various types, each with its own distinct mechanism, vie for your attention. Let us embark on a journey through these handles and uncover their secrets: First, we encounter the enigmatic ball-type handles.
Hidden within their core lies a mesmerizing rotating ball, a conductor of water’s symphony. With a simple twist, the ball grants passage to the liquid, controlling both its flow and temperature. A dance of precision and grace unfolds as water cascades through the faucet.
Next, we encounter the elusive cartridge-type handles. Cloaked in mystery, these handles possess a cartridge that possesses the power to open and close, dictating the very essence of water’s journey. Crafted with ceramic discs or rubber seals, they offer unparalleled control over flow and temperature.
Delicate adjustments yield exquisite results, as water obeys your every command. Lastly, we stumble upon the timeless compression-type handles. Steeped in tradition, these handles bear a stem that rises and falls, guiding the flow of water.
With a single motion, a rubber washer seals the passage, only to be released by the lifting of the handle. It is a dance as old as time, a symphony of simplicity and reliability. Each handle type possesses its own allure, its own unique set of advantages and disadvantages.
The ball-type handle beckons with its smooth rotation, the cartridge-type handle entices with its precise control, and the compression-type handle holds steadfast to tradition. The choice is yours, dear reader, to find the handle that resonates with your style and brings forth the joy of a dependable faucet in your humble abode.
Types of Faucet Handles and Their Tightening Methods (Tabelle)
| Faucet Handle Type | Tightening Method |
|---|---|
| 1. Screw-on Handle | Use a wrench to tighten the handle onto the valve stem. Turn the handle clockwise to tighten. |
| 2. Push-on Handle | Apply adhesive or plumber’s tape to the valve stem before pushing the handle back on tightly. Ensure the handle is aligned properly and firmly push it onto the stem. |
| 3. Knob Handle | Remove the decorative cap on top of the knob and tighten the screw located underneath using a screwdriver. Turn the screw clockwise to tighten. |
| 4. Lever Handle | Locate the set screw on the side or bottom of the handle and tighten it using an Allen wrench. Turn the set screw clockwise to tighten. |
| 5. Ball Handle (for single-handle faucets) | Remove the handle’s decorative cap, then use pliers to tighten the adjusting ring located under the cap. Turn the adjusting ring clockwise to tighten. |
| 6. Cartridge Handle (for single-handle faucets) | Remove the handle’s decorative cap, then use pliers to tighten the retaining nut located under the cap. Turn the retaining nut clockwise to tighten. |
| 7. Disk Handle (for single-handle faucets) | Remove the handle’s decorative cap, then use pliers to tighten the retaining nut located under the cap. Turn the retaining nut clockwise to tighten. |
4/8 How Faucet Handles Without a Set Screw Work
The enigmatic allure of faucet handles without set screws may leave you puzzled, but fear not, for their functionality lies in other ingenious components. With various types to choose from, each handle operates through its own distinct mechanism. Whether it be the rotating ball inside a ball-type handle, the cartridge within a cartridge-type handle, or the moving stem of a compression-type handle, these handles require no set screw.
Instead, they rely on the harmonious collaboration of O-rings, washers, and springs to secure their position while allowing for effortless movement. As you turn the handle, it orchestrates the flow and temperature of water by manipulating internal components. To ensure their impeccable performance, it is vital to regularly clean and lubricate these intricate parts.
Remember, it is this exceptional mechanism and reliance on other components that empower these handles to effortlessly control water flow and temperature, even in the absence of a set screw.

5/8 Tools You Will Need
In order to fix a loose faucet handle without a set screw, you’ll need a few essential tools on hand. First, grab an adjustable wrench, which will allow you to tighten any loose components in the handle. Its adjustable jaws make it easy to grip and tighten nuts and bolts of varying sizes.
Next, depending on the type of faucet handle you have, you’ll need either a flathead or a Phillips screwdriver. Make sure to choose the appropriate size for a secure fit. Finally, don’t forget the plumbers tape.
This thin, flexible tape is essential for creating a watertight seal and preventing any leaks. Wrap a few layers around threaded connections before reassembling the handle. Armed with these tools and a little bit of know-how, you’ll have your faucet handle back in working order in no time.
Did you know that the oldest known plumbing system dates back to around 4000-3000 BCE in the Indus Valley Civilization? They had intricate drainage systems and even used clay pipes for water supply. It’s fascinating to see how far plumbing technology has come since then!

6/8 Step-by-Step Guide to Tighten a Loose Faucet Handle
Fixing a loose faucet handle is a simple task that will spare you the hassle of dealing with a wobbly, leaky mess. Here’s what you need to do: First, take a look at the handle for any visible screws or fasteners. If you don’t spot any, fret not, for we have alternative solutions.
Next, arm yourself with an adjustable wrench and locate the base of the handle where it connects to the faucet. With the wrench in hand, turn it clockwise to tighten the handle. Be cautious not to tighten it excessively and risk causing damage.
To ensure a leak-free experience, apply plumber’s tape. Take a small strip of tape and wrap it around the threads of the handle base, creating a secure seal. By following these steps, you can effortlessly restore your loose faucet handle to its former glory.
Remember to regularly inspect and maintain your handles to prevent any future mishaps.
If you’re interested in learning more about the benefits and installation process of a ground to water pipe system, check out our article on “Ground to Water Pipe” .
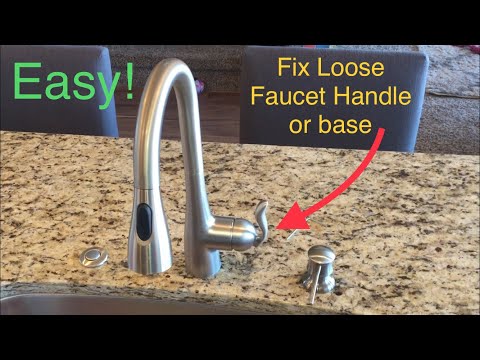
Dealing with a loose faucet handle can be frustrating, especially when there’s no set screw to tighten it. In this video, you’ll learn how to tighten a loose faucet handle and base on a Moen faucet in both kitchen and bathroom settings. Say goodbye to that wobbly handle!
7/8 Regular Maintenance of Faucet Handles
The Art of Maintaining Faucet Handles To preserve the pristine condition of your faucet handle, regular maintenance is key. It is imperative to cleanse the handle routinely to rid it of the dirt and debris that inevitably accumulate over time. A simple swipe with a damp cloth or mild soap and water will suffice.
Not only does this keep the handle aesthetically pleasing, but it also prevents any build-up that may hinder its functionality. Equally important is the need to inspect the handle for any signs of wear and tear. Look out for cracks, loose components, or any other damage that might impede its performance.
Detecting these issues early on can avert further harm and spare you from costly repairs down the line. Furthermore, lubricating the moving parts is a critical step in maintaining faucet handles. This ensures smooth operation and prevents any stiffness or difficulty when maneuvering the handle.
Utilize a silicone-based lubricant or plumber’s grease to lubricate the handle’s mechanism. Apply a small amount to the moving parts and work the handle back and forth to evenly distribute the lubricant. By adhering to these maintenance guidelines , you can prolong the lifespan of your faucet handle and guarantee its continued efficacy.
Remember, a little regular care goes a long way in preserving the impeccable condition of your handle.

Why is Your Faucet Handle Loose and How to Fix It without a Set Screw
- A loose faucet handle can be identified by its wobbling or shaking when you try to turn it on or off.
- Other signs of a loose faucet handle include a squeaking or grinding noise when you use it, or difficulty in fully closing or opening the faucet.
- A loose faucet handle can be caused by regular wear and tear, improper installation, or a faulty mechanism.
- Some faucet handles do not have a set screw, which is a small screw that secures the handle to the valve stem. Instead, they rely on other mechanisms to hold the handle in place.
- Common types of faucet handles without a set screw include lever handles, knob handles, and handle caps.
- Faucet handles without a set screw usually work by gripping the valve stem tightly, using friction or a locking mechanism to prevent the handle from coming loose.
8/8 Choosing Quality Faucet Hardware
Selecting the perfect hardware for your faucet is crucial. Take into account various factors such as the type of handle you have and its specific requirements. Opt for durable materials like brass or stainless steel that can resist corrosion and endure daily wear and tear.
Additionally, consider the aesthetic appeal of the faucet and choose a finish that complements the existing fixtures in your bathroom or kitchen. Whether you lean towards a contemporary or traditional design, there are plenty of options available to match your style. By choosing top-notch hardware, you guarantee that your faucet handle will remain secure and functional for years to come.
CONCLUSION
In conclusion, identifying and addressing a loose faucet handle with no set screw is an essential skill for homeowners. This article has provided a comprehensive understanding of the signs and reasons for a loose faucet handle, as well as step-by-step instructions on how to tighten it without a set screw. By following the troubleshooting guide and implementing preventive measures, such as regular maintenance and choosing quality faucet hardware, homeowners can avoid future issues with loose faucet handles.
We hope that this article has been helpful in addressing the search intent of users looking for solutions to a loose faucet handle with no set screw. For more informative articles on home maintenance and repairs, we recommend exploring our other resources on plumbing and DIY projects.
FAQ
How can I remove a Delta faucet handle that has no set screw?
Certain Delta® bathroom sink faucets manufactured after 2021 are equipped with a convenient Push-Fit Handle. This innovative feature eliminates the necessity of a set screw to fasten the handle onto the faucet. To effortlessly remove a Push-Fit Handle, simply align it with the spout and gently pull it straight away from the faucet body. This user-friendly design ensures a hassle-free experience for individuals who prefer an easy and efficient way to adjust their faucet handles.
How do you fix a faucet handle that won’t turn off?
To fix a loose faucet handle, you can try tightening the screws. This can be done using a screwdriver or an Allen wrench. Remember to turn off the water before attempting this quick and simple DIY fix. By tightening the handle screws, you may be able to resolve the issue on your own without the need for professional assistance.
What tool is used to tighten a single handle kitchen faucet?
To make the task easier, you’ll require a basin wrench, which is a specialized plumbing tool. This tool features a long handle with a tee on one end, providing you with the necessary leverage. On the other end, there is a spring-loaded adjustable wrench head that securely grips onto the nut. With the long handle, you can easily access and tighten the hard-to-reach nuts behind the sink basin.