Are you in the process of remodeling your kitchen or installing a new sink? If so, understanding the basics of kitchen sink plumbing rough in is crucial for a successful installation . Whether you’re a DIY enthusiast or hiring a professional, having a solid understanding of the components, measurements , and steps involved in kitchen sink plumbing rough in can save you time, money, and potential headaches down the line.
In this article, we will guide you through the process of roughing in your kitchen sink plumbing, providing tips, troubleshooting advice, and essential information you need to ensure a smooth and functional kitchen sink plumbing rough in. So, if you’re ready to dive into the world of kitchen sink plumbing rough in, let’s get started!
By the way, if you’re interested in learning more about kitchen sink plumbing rough in measurements, I found a helpful article with all the details you need, check it out here .
Briefly explained: what you need to know about the subject
- Understanding Kitchen Sink Plumbing: – Importance of correct plumbing rough-in – Basic components: pipes, fittings, sink drains, P-traps, garbage disposal units
- Standard measurements for kitchen sink plumbing rough-in: – Height considerations for drain pipes – Proper placement of vent pipes – Distance between sink drains and P-traps
- Step-by-step guide to rough in your kitchen sink plumbing: – Preparing the area – Installing the drain pipe – Setting up the P-trap

1/15 The Importance of Correct Plumbing Rough In
A well-executed plumbing rough-in is essential for a fully functional and dependable kitchen sink. It guarantees effective drainage, eliminates leaks and unpleasant odors, and enables seamless integration with other plumbing fixtures. By dedicating your time and energy to a proper rough-in, you can establish a meticulously designed and efficient kitchen plumbing system that will endure the test of time.
Pipes and Fittings
When it comes to kitchen sink plumbing, it’s essential to familiarize yourself with the different pipes and fittings at your disposal. PVC pipes offer durability and corrosion resistance, while copper pipes boast longevity and the ability to withstand high temperatures. To guarantee leak-free operation and optimal drainage, the proper sealing and connection of pipes and fittings is of utmost importance.
Don’t forget to consider the size and material of these components to ensure compatibility with other kitchen fixtures. By grasping these crucial factors and taking the necessary precautions, you can achieve a dependable and efficient plumbing system in your kitchen.
If you’re curious about how kitchen sink plumbing works, check out this helpful kitchen sink plumbing diagram that breaks it down for you step by step.

Sink Drains
Your kitchen sink plumbing system relies heavily on the functionality of sink drains. With various types to choose from, such as basket strainers , pop-up drains, and garbage disposal drains, it’s important to understand their unique features. Basket strainers are designed to catch food particles and debris, preventing clogs from occurring.
On the other hand, pop-up drains provide you with the ability to control water flow using a lever or knob. To keep your sink drains in optimal condition, regular maintenance is key. This involves cleaning them on a consistent basis to remove grease, food particles, and debris.
You can use simple household ingredients like baking soda and vinegar , or opt for a commercial drain cleaner if preferred. Additionally, it’s crucial to check for any leaks or loose connections and tighten them as necessary. Unfortunately, sink drains can encounter common issues such as clogs , slow drainage, and foul odors.
In the event of a clog, a plunger or drain snake can be used to effectively remove it. However, if the problem persists, you may need to take more drastic measures by removing the trap located under the sink to clear any blockages. As for foul odors, a simple solution of hot water and baking soda poured down the drain can work wonders in eliminating bacteria and restoring freshness.
By familiarizing yourself with the different types of sink drains, consistently maintaining them, and troubleshooting common issues, you can ensure that your kitchen sink plumbing operates seamlessly and efficiently.
P-Traps
In the intricate world of kitchen sink plumbing, there exists a humble hero known as the P-Trap. This unassuming contraption plays a vital role in safeguarding your kitchen from the foul stench of sewer gases. Its duty extends beyond mere odor prevention, as it also helps ward off pesky clogs and keeps your drainage system running smoothly.
However, like any unsung hero, the P-Trap requires regular cleaning and maintenance to fulfill its noble purpose. Take a moment to inspect for leaks and cracks, addressing them promptly to maintain the integrity of this essential component. By nurturing and understanding the significance of P-Traps, you can bask in the glory of a well-functioning and sanitary plumbing system within your cherished kitchen.

Garbage Disposal Units
Transforming your kitchen into a pristine haven, a garbage disposal unit revolutionizes the way you handle food waste. With a multitude of advantages, these devices effortlessly streamline your daily routine and enhance efficiency. One of the most significant benefits of a garbage disposal unit is its ability to reduce food waste in your trash can.
By pulverizing scraps and peelings into minuscule particles, it eliminates the need for them to sit and emit unpleasant odors. Additionally, this process helps ward off pests, ensuring a hygienic kitchen environment. To ensure optimal performance, regular maintenance and cleaning are vital for your garbage disposal unit.
Running cold water while using the device helps to flush away debris and prevent clogs. Occasionally grinding ice cubes or citrus peels freshens the unit and eliminates any buildup. While garbage disposal units may encounter occasional issues such as jammed blades or strange odors, troubleshooting can often resolve these problems.
For jammed blades, utilizing a hex wrench to manually rotate them and remove obstructions can prove effective. To combat odors, grinding a mixture of baking soda and vinegar will eradicate any unpleasant smells. By incorporating a garbage disposal unit into your kitchen, you will experience the convenience of efficient waste disposal.
Just remember to maintain and clean your unit regularly to ensure its smooth operation. And if any issues arise, fear not – a little troubleshooting will swiftly restore your disposal unit to its full functionality.

2/15 Height Considerations for Drain Pipes
When it comes to plumbing your kitchen sink, getting the positioning and height of drain pipes just right is absolutely essential. It’s all about ensuring a smooth flow of water and avoiding any nasty backups. You see, having the correct slope and height is what allows gravity to do its thing and help with drainage.
Plus, it prevents any obstructions or potential flooding. On the flip side, if you get the height wrong, you’re just asking for clogs and a whole lot of headaches. So, take the time to carefully consider the slope and height when you’re installing those drain pipes.
Trust me, it’ll save you from future plumbing nightmares.
If you’re curious about how the plumbing in your kitchen works, check out this detailed kitchen plumbing diagram that breaks down the different components and their connections.
3/15 Proper Placement of Vent Pipes
The Vital Importance of Proper Vent Pipe Placement In the intricate realm of kitchen sink plumbing, the positioning of vent pipes holds immense significance. These humble conduits ensure the smooth flow of air, keeping your entire plumbing system in optimal health and efficiency. However, a misplaced vent pipe can unleash a torrent of sewer gas odors, infiltrating your kitchen and posing potential health hazards.
To thwart this unwelcome invasion, it is imperative to carefully position these pipes, preventing the spread of noxious fumes throughout your abode. Equally vital is the avoidance of placing vent pipes near windows and doors, for any wayward drafts could disrupt the precious airflow. By maintaining a safe distance from these openings, the pipes can fulfill their duty with unwavering efficiency, enabling a steady flow of air.
Thus, when contemplating the placement of vent pipes in your kitchen sink plumbing, remember the paramount importance of air circulation and odor prevention. Adhering to these principles and ensuring accurate positioning, you shall be rewarded with a plumbing system that is both healthy and highly efficient, transforming your kitchen into a haven of seamless functionality.

Everything You Need to Know About Kitchen Sink Plumbing Rough In
- Kitchen sink plumbing rough in is an essential step in the installation of a kitchen sink, ensuring proper functionality and preventing future plumbing issues.
- The basic components of kitchen sink plumbing include pipes and fittings, sink drains, P-traps, and garbage disposal units (if applicable).
- Standard measurements for kitchen sink plumbing rough in include considerations for the height of drain pipes, proper placement of vent pipes, and the distance between sink drains and P-traps.
- A step-by-step guide to rough in your kitchen sink plumbing involves preparing the area, installing the drain pipe, setting up the P-trap, connecting the vent pipe, and mounting the garbage disposal unit (if applicable).
- Tips for successful kitchen sink plumbing rough in include using quality materials, adhering to local plumbing codes, and seeking professional assistance when needed.
4/15 Distance Between Sink Drains and P-Traps
The alignment between sink drains and P-Traps plays a crucial role in the efficiency of your kitchen sink plumbing. A small deviation in distance can lead to troublesome clogs and other plumbing mishaps. To avoid such issues, it is essential to take into account the dimensions of your sink and P-Trap when determining the correct distance.
By maintaining the appropriate distance, you allow for smooth wastewater flow, eliminating the risk of clogs and blockages. Remember to measure the distance meticulously, taking into consideration the size, shape, and dimensions of both the sink and the P-Trap. This meticulous alignment ensures optimal drainage, keeping your plumbing system in top shape.
On the contrary, an incorrect distance can result in inadequate drainage, leading to water backup, unpleasant odors, and even leaks. Therefore, it is crucial to pay attention to this detail during the rough-in process of your kitchen sink plumbing installation. By prioritizing the maintenance of the proper distance, you guarantee a fully functional plumbing system that operates efficiently, effectively preventing any potential plumbing issues in the future.
5/15 Preparing the Area
Before embarking on the installation of kitchen sink plumbing, it is essential to lay the groundwork. To establish a conducive atmosphere, rid the space of any existing fixtures and debris. Adequate lighting and ventilation are crucial to avoid errors and unpleasant odors.
By meticulously preparing the area, you pave the way for a seamless installation process. Thus, start by decluttering the space, eliminating fixtures and debris, and establishing a well-lit and properly ventilated work area.

6/15 Installing the Drain Pipe
Achieving the perfect alignment while installing your kitchen sink’s drain pipe is absolutely essential. It guarantees a seamless flow of water and prevents any potential blockages. To steer clear of leaks and water-related damages, make sure to invest in top-notch waterproof sealing.
Furthermore, opt for a sturdy pipe size and material that can resist corrosion. By following these guidelines, you can ensure efficient drainage and minimize the chances of encountering plumbing issues in the future.
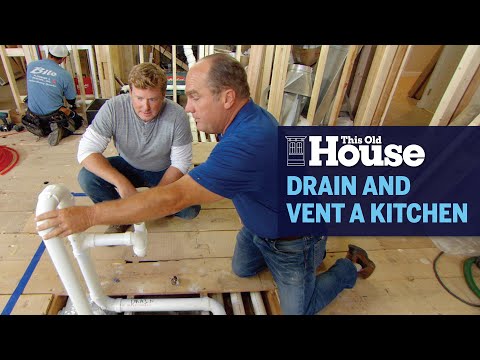
Are you in the process of setting up your kitchen plumbing? Learn how to properly drain and vent your kitchen sink in this informative video from This Old House.
7/15 Setting Up the P-Trap
The proper alignment of your kitchen sink’s P-Trap is essential for its effective functioning. This curved pipe acts as a barrier against leaks and unpleasant odors. To guarantee a tight connection, it is crucial to securely fasten the P-Trap to the drain pipe.
In addition, you must consider the correct height placement of the P-Trap to ensure optimal drainage. The height should be determined by the dimensions of your sink and the P-Trap itself. A sufficient height allows for the smooth flow of water and helps prevent clogs in your plumbing system.
Follow the instructions provided by the manufacturer and utilize the appropriate tools to install the P-Trap. Take your time to align it accurately with the drain pipe and ensure a secure connection. Make sure to tighten all fittings to prevent any potential leaks.
By paying attention to these crucial details and correctly setting up your P-Trap, you can achieve efficient drainage and a fully functional kitchen sink plumbing system. Do not underestimate the significance of this step, as it can potentially save you from future plumbing complications.
8/15 Connecting the Vent Pipe
Ensuring a proper installation is key when connecting the vent pipe in your kitchen sink plumbing. This is vital for maintaining optimal air circulation, preventing unwanted odors and leaks. To achieve this, position the vent pipe above the drain pipe to promote efficient airflow and prevent blockages.
Additionally, use airtight connections to safeguard against leaks and uphold a clean and fresh kitchen environment. Remember, paying attention to every detail during installation will help you avoid any future problems. By following these steps, you can enjoy a smoothly functioning plumbing system that keeps your kitchen pristine and inviting.
If you’re interested in learning more about the Galba small toilet, check out our comprehensive review here .

9/15 Mounting the Garbage Disposal Unit (if applicable)
Enhance the functionality of your kitchen sink with a garbage disposal. Prioritize safety by adhering to the manufacturer’s instructions and electrical wiring guidelines during installation. To ensure optimal performance and avoid unpleasant odors, regular cleaning and maintenance are crucial.
By investing time and effort into the correct installation and consistent upkeep, you can effortlessly dispose of food waste and prevent sink and pipe blockages. Experience the convenience of efficient waste disposal in your kitchen.
How to Install Kitchen Sink Plumbing: A Step-by-Step Guide
- Start by preparing the area where you will be installing the kitchen sink plumbing.
- Next, install the drain pipe, ensuring it is properly connected to the sink drain.
- Set up the P-trap, making sure it is correctly positioned and securely attached.
- Connect the vent pipe, ensuring it is properly placed to allow for proper drainage and ventilation.
- If applicable, mount the garbage disposal unit according to the manufacturer’s instructions.
- Lastly, make sure to test the plumbing system for any leaks or clogs and address them accordingly.
10/15 Using Quality Materials
Selecting the appropriate materials for your kitchen sink plumbing is of utmost importance. Prioritize durability by opting for top-notch pipes and fittings that can endure frequent use and potential damage. It is also crucial to choose materials that are resistant to corrosion to prevent leaks and prolong the lifespan of your plumbing system.
High-quality materials offer superior performance , reliability, and efficient drainage, all while minimizing the risk of water damage. Although the initial cost may be higher, investing in quality materials ultimately proves to be a wise decision in the long term. Refrain from taking shortcuts and prioritize quality to ensure a dependable and enduring plumbing system.
11/15 Adhering to Local Plumbing Codes
Safety and compliance are paramount when it comes to kitchen sink plumbing. Local codes play a vital role in ensuring these aspects are met, preventing penalties and promoting a healthier environment. By following these guidelines for installation and maintenance, you can ensure your plumbing meets the necessary standards, allowing for efficient and safe functioning.
Make it a priority to familiarize yourself with these codes and adhere to them diligently for a secure plumbing system and a greener world.

12/15 Seeking Professional Assistance When Needed
In the realm of kitchen sink plumbing, it is wise to enlist the expertise of a professional. With their wealth of knowledge and experience, they can navigate intricate tasks effortlessly, swiftly resolving any problems that arise. Opting for a professional plumber guarantees a job well done from the very start, sparing you precious time and resources.
To locate a dependable plumber, seek recommendations and peruse online reviews. Undertaking plumbing endeavors independently can cause further harm and hazards. Ultimately, engaging a professional plumber presents a multitude of advantages while sidestepping potential complexities.
Table: Recommended Pipe Sizes for Different Plumbing Applications
| Pipe Size (inches) | Recommended Use |
|---|---|
| 1 1/2 | Main drain pipe from sink to P-trap |
| 1 1/4 | Branch drain pipe for multiple sinks |
| 2 | Main drain pipe for double-bowl sink with garbage disposal |
| 3 | Vent pipe for efficient air circulation |
| 4 | Main drain pipe for larger sinks or bathtubs |
| 6 | Main drain pipe for multiple fixtures or large volume flow |
| 8 | Main drain pipe for commercial or industrial applications |
13/15 Leaking Pipes
A troublesome and costly predicament, leaking pipes in the kitchen sink have the power to frustrate any homeowner. There are a variety of reasons why these leaks occur, including the gradual buildup of corrosion or rust, as well as improper installation. To tackle the issue head-on, begin by searching for visible indications of water or moisture surrounding the pipes in your kitchen sink.
Keep an eye out for any discoloration or dampness on the walls or flooring near the sink. Alternatively, run your hand along the pipes to detect any wetness, or employ a flashlight to scrutinize for drips or water stains. Once the source of the leak has been pinpointed, several potential solutions can be attempted.
Utilize pipe sealants or joint compounds to seal any cracks or gaps that are present. In addition, temporary fixes can be implemented using pipe clamps or repair tape. Speedy action is crucial in order to prevent further damage and wastage of water.
To prevent future leaks from occurring, it is essential to regularly inspect the pipes for signs of wear and tear or deterioration, and address any issues immediately. Avoid the usage of harsh chemical drain cleaners, as they have the potential to corrode the pipes over time. Instead, opt for natural or enzymatic drain cleaners.
By equipping yourself with knowledge regarding the common causes of leaks, mastering the art of detection and location, and implementing effective repair and prevention techniques, you can ensure that your kitchen sink plumbing system remains free from the pesky problem of leaks.
14/15 Drain Clogs
The Dreaded Drain Clog Oh, the woes of a clogged drain! In the realm of kitchen sink plumbing , this nuisance reigns supreme. The culprits?
Food debris, grease, and oil. Over time, those pesky food bits can gather and create blockages, while hot grease and oil can congeal and cling to the pipes. To prevent the nightmare of drain clogs, be diligent in scraping off leftover food and avoid the temptation to pour grease or oil down the sink.
Instead, let them cool and dispose of them properly. If, despite your best efforts, a clog occurs, fear not! Arm yourself with a trusty plunger or a handy drain snake to clear the obstruction.
And if all else fails, do not hesitate to summon the aid of a professional plumber. By understanding the causes of drain clogs and taking preventive measures, you can keep your kitchen sink plumbing flowing smoothly. And even if a clog does rear its ugly head, you now possess the foolproof techniques to vanquish it and restore your sink to its former glory.

15/15 Improper Sink Drain Venting
Your plumbing system is at risk when sink drain venting is not done properly. Look out for signs like gurgling noises, foul odors, and slow drainage. These issues occur when there’s trapped air or insufficient venting of sewer gases.
Improper venting can lead to leaks, bursts, and other damages caused by increased pressure in the pipes. It can also result in the accumulation of harmful sewer gases, posing health risks and damaging the pipes in the long run. To fix the problem, make sure the vent pipe is correctly installed and positioned above the sink drain.
If you suspect improper venting, it’s best to consult a professional plumber for assessment and necessary adjustments. Acting promptly to address improper sink drain venting will prevent further damage and ensure that your kitchen sink operates efficiently and without any unpleasant odors.
CONCLUSION
In conclusion, understanding kitchen sink plumbing rough in is essential for ensuring proper installation and functionality of your kitchen sink. This article has provided a comprehensive overview of the importance of correct plumbing rough in, the basic components of kitchen sink plumbing, standard measurements for rough in, a step-by-step guide for installation, tips for success, and troubleshooting tips for common problems. By following this guide, users will be equipped with the knowledge and understanding needed to successfully rough in their kitchen sink plumbing.
We recommend exploring our other articles on kitchen plumbing for further guidance and information on related topics. Happy plumbing!
FAQ
What is the rough-in height for kitchen sink drains?
For double bowl sinks with an extra deep side and a garbage disposer, it is important to rough in the drain at a low height of about 13-14 inches. This will ensure that you are prepared for any unforeseen issues. Additionally, it is recommended to keep the drain roughed in about 6 inches off center. The positioning of the hot and cold water supply is not as crucial in this case.
What is the height of a kitchen sink from the floor?
Usually, kitchen sinks are positioned either near or facing a window. It is recommended that the height of the sink be between 850 mm (33 inches) to 900 mm (35 inches) from the floor. However, the specific height can vary depending on the user’s standing height.
What size drain pipe for a kitchen sink?
The diameter of this pipe is commonly 1 1/2 inches, but it’s worth noting that some homes may have 2-inch drainage pipes instead. In such situations, it becomes necessary to use a reducing bushing to connect the pipes together. To ensure a proper fit, it is recommended to use a 1 1/2 inch to 2 inch reducing bushing.
What is a sink rough-in?
Rough-in plumbing involves installing the primary pipes and necessary components of a plumbing system before the final fittings are completed. This crucial step takes place before closing the walls, ensuring convenient access for the installer. Additionally, it helps lay the foundation for a functional and efficient plumbing system in the future.