Plumber’s putty is a versatile and essential tool in the world of plumbing. Whether you are a DIY enthusiast or a professional plumber, knowing how to properly use and remove plumber’s putty is crucial for any plumbing job. In this article, we will delve into the details of how to remove plumbers putty, including its purpose, application, and removal methods.
If you’ve ever wondered how to remove plumber’s putty or are simply looking to enhance your plumbing skills, you’ve come to the right place. Let’s explore the ins and outs of this handy substance and discover the best techniques for using and removing how to remove plumbers putty effectively. So, if you’re ready to dive into the world of plumber’s putty, let’s get started!
Summary in three points
- Plumber’s Putty is a commonly used material in plumbing.
- It is applied in various plumbing tasks such as sealing joints and preventing leaks.
- Plumber’s Putty can be removed using different methods including bare hands, knife, soapy water, and solvents.

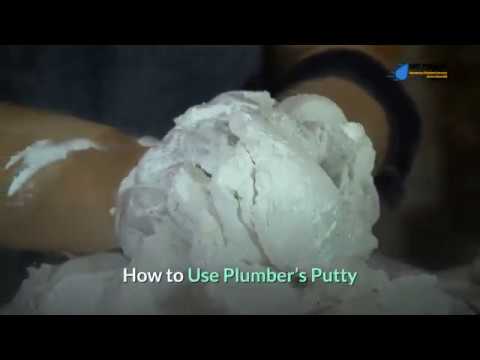
1/11 What Is Plumber’s Putty?
When it comes to plumbing repairs , there is one essential tool that every expert relies on: plumber’s putty . This incredible substance is like magic in a tube, capable of creating impenetrable seals around fixtures to keep leaks and water damage at bay. It’s a plumber’s version of playdough, easily moldable and perfect for any surface.
With its expert application, it forms a formidable barrier that stops water from seeping through gaps and joints. From sinks to faucets to showerheads, plumber’s putty is the ultimate companion for leak-free connections . Say farewell to those pesky leaks and embrace the power of plumber’s putty for your next plumbing project.
If you’re struggling with removing plumber’s putty, check out our article on how to remove plumber’s putty for helpful tips and tricks to get the job done.
If you’re tired of dealing with a slow flushing toilet, check out our article on how to fix a slow flushing toilet for some easy solutions to get your toilet flushing properly again.
2/11 Why Is It Used In Plumbing?
Plumber’s putty, the indispensable tool of the plumbing trade, safeguards against leaks and water damage in essential fixtures such as sinks and faucets. With a simple application around the fixture, this remarkable substance forms a watertight seal, preserving the integrity of your plumbing system. Whether you’re installing a new sink or replacing a faucet, incorporating plumber’s putty guarantees a trustworthy and enduring seal.
Don’t forget to include this leak-free solution in your upcoming plumbing endeavors.

3/11 Where Do You Use Plumber’s Putty?
In the world of bathroom and kitchen installations, there is a silent hero that ensures peace of mind and protection against leaks and water damage. Meet plumber’s putty, the unsung champion that creates watertight seals and secures the integrity of your plumbing fixtures. From sealing drains and traps in the bathroom to safeguarding sinks in the kitchen, this trusty tool guarantees a reliable and long-lasting seal.
Say goodbye to worries and hello to a leak-free existence with the power of plumber’s putty.
Comparison of Solvents for Cleaning: A Comprehensive Table
| Solvent Name | Effectiveness | Safety | Application Method | Drying Time | Residue Removal | Odor | Availability | Cost | Notes |
|---|---|---|---|---|---|---|---|---|---|
| Mineral Spirits | 4 | Moderate (flammable, use in a well-ventilated area) | Apply with a clean cloth or sponge | 10-15 minutes | Wipe off any residue with a clean cloth or rinse with water | Moderate | Widely available in hardware stores and online | Moderate | Avoid prolonged skin contact, use gloves for protection |
| Acetone | 5 | High (highly flammable, use in a well-ventilated area, avoid contact with skin) | Apply with a clean cloth or brush | 5-10 minutes | Wipe off any residue with a clean cloth or rinse with water | Strong | Widely available in hardware stores and online | Low | Extremely flammable, handle with caution |
| Isopropyl Alcohol | 3 | Low (flammable, use in a well-ventilated area) | Apply with a clean cloth or sponge | 15-20 minutes | Wipe off any residue with a clean cloth or rinse with water | Moderate | Widely available in pharmacies, hardware stores, and online | Low | Avoid prolonged skin contact, use gloves for protection |
| Denatured Alcohol | 4 | Moderate (flammable, use in a well-ventilated area) | Apply with a clean cloth or sponge | 10-15 minutes | Wipe off any residue with a clean cloth or rinse with water | Moderate | Widely available in hardware stores and online | Low | Avoid prolonged skin contact, use gloves for protection |
| Vinegar | 2 | Low (non-toxic, but may irritate skin and eyes) | Apply with a clean cloth or sponge | 20-30 minutes | Wipe off any residue with a clean cloth or rinse with water | Mild | Widely available in grocery stores | Low | Safe for most surfaces, but may not be as effective on tough stains |
4/11 How Do You Apply Plumber’s Putty?
In the realm of plumbing, mastering the art of preparation is paramount. Before embarking on any endeavor involving plumber’s putty, it is imperative to commence with a thorough cleaning of the designated surface. This diligent step ensures an unyielding seal, capable of withstanding the test of time.
Now, let us delve into the delicate process of applying this remarkable substance. Take a small portion of putty and skillfully mold it into a slender rope-like shape. This astute maneuver grants you greater dexterity, allowing for a seamless interaction with the putty.
With utmost care and precision, proceed to apply the putty around the fixture, encompassing every nook and cranny that necessitates a sealing embrace. Employ your fingers or the ever-reliable putty knife to shape and polish the putty, should the need arise. Once this meticulous task reaches its completion, it is time to bid adieu to any superfluous putty.
Employ a trusty cloth or sponge to meticulously remove any excess, leaving behind a pristine and professional finish. Dear reader, do not forget that plumber’s putty is a versatile companion, ready to cater to your whims and fancies. Do not shy away from experimentation and adjustments.
Through perseverance and practice , the realm of plumbing shall soon bow before your expert touch.

1. With Bare Hands
Curious about the possibility of removing plumber’s putty without any tools? While it can be done, there are some safety precautions to consider. To begin, make sure you’re wearing gloves to protect your hands.
It’s also a good idea to have a towel nearby for easy cleanup. Next, gently scrape away the putty using your fingers. Avoid applying too much pressure to prevent any damage to the surface.
If the putty proves to be stubborn , try using a plastic scraper or wooden stick to help loosen it. Just be cautious not to scratch the surface in the process. Keep in mind that removing plumber’s putty by hand can get messy, so be prepared to clean up any residue.
You can use soapy water or a putty-specific solvent for this task. If you’re unsure or uncomfortable with the process, it’s always best to consult a professional plumber for assistance.
2. Using A Knife Or Utility Blade
To remove plumber’s putty, it’s best to prioritize safety first. Ensure you have protective gloves and a sharp knife or utility blade in good condition. Carefully insert the blade under the putty and lift it away, being mindful not to use excessive force.
If the putty proves stubborn, try applying a little heat to soften it. Another option is to use plastic or rubber scrapers to prevent any potential damage. Always remember to prioritize safety and use the right technique and tools for a spotless surface.
If you’re struggling with rust stains in your toilet bowl, check out our article on how to remove rust from toilet bowl for effective tips and tricks to get your toilet looking clean and rust-free again.

Did you know that plumber’s putty has been used for centuries? It dates back to ancient Rome, where it was used to seal pipes and prevent leaks. So the next time you use plumber’s putty, remember you’re using a tried and true method that has stood the test of time!

3. Using Soapy Water
Introducing a powerful solution for the stubborn grip of plumber’s putty – soapy water . This remarkable remedy not only loosens the putty’s hold but also eliminates any lingering remnants. Follow these steps to unlock its full potential:
1. Begin by ensuring the area is pristine, free from debris and excess putty or dirt.
2. Create the magic potion by filling a bucket with warm water and adding a few drops of trusty dish soap. Stir until the soap dissolves, transforming the water into a soothing sea of suds.
3. Now, immerse a cloth or sponge into this enchanting elixir and gently massage the putty-laden area. Employ small, circular motions and allow the solution to marinate for a few minutes.
4. Like a skilled artisan, wield a putty knife to delicately scrape away the softened putty. Exercise caution to avoid any harm to the surface beneath.
5. Bid farewell to any trace of soapy residue by rinsing the area with pristine water. Ensure the surface is thoroughly dried before embarking on your next plumbing endeavor. Remember, a meticulous cleanup is vital to prevent any pesky clogs or damage to your plumbing system.
With these steps, you possess the power to effortlessly vanquish plumber’s putty and lay the foundation for your future projects.
4. Using Mineral Spirits And Paint Thinners
Removing plumber’s putty can be made easier with the help of mineral spirits or paint thinners, but safety should always be the top priority. To protect yourself, it’s essential to wear gloves and goggles to avoid any direct contact with the solvent. These substances can be harmful to the skin and eyes, so taking precautions is crucial.
Additionally, make sure the area is well-ventilated to prevent inhaling any fumes. To effectively remove plumber’s putty using mineral spirits or paint thinners, start by applying the solvent directly onto the putty, ensuring that it is thoroughly covered. Allow the solvent to penetrate the putty for a few minutes, loosening its hold on the surface.
Next, use a putty knife or scraper to gently scrape off the softened putty, being careful not to damage the surface underneath. If necessary, repeat the process by reapplying the solvent and continuing to scrape until all the putty is gone. Once the putty is removed, clean the area with soapy water to eliminate any residue left by the solvent.
Rinse thoroughly and ensure that the surface is completely dry before applying any new sealant or adhesive. Lastly, it’s important to dispose of the used solvent properly in accordance with local regulations. By following these instructions and taking the necessary precautions, you can successfully remove plumber’s putty using mineral spirits or paint thinners.

5. Using A Heat Gun
In the realm of plumbing, where the mastery of tools is a sacred art, one instrument stands above the rest – the heat gun . With its fiery breath, it possesses the power to melt away the stubborn grip of plumber’s putty. But like any formidable force, it must be wielded with utmost care.
Before venturing into this battle, equip yourself with the armor of heat-resistant gloves and the shield of eye protection. These safeguards will ensure your safety amidst the heat’s relentless assault. Now, with the heat gun in hand, set its temperature to a humble low or medium setting.
This delicate balance will provide the necessary warmth without scorching the very essence of your task. Steadying yourself, position the heat gun at a distance of 2-3 inches from the putty, ready to unleash its transformative power. In a dance of control and precision, move the heat gun in a slow, sweeping motion.
Allow its heat to caress the putty, coaxing it into a malleable state. Be wary, however, of the dangers that lie in the path of a wayward flame. Divert your attention from flammable materials and keep the heat gun in constant motion, lest the fires of chaos be unleashed.
In the end, it is the heat gun that emerges victorious, making the removal of plumber’s putty a task of ease and safety. As you revel in the satisfaction of a job well done, remember the power that resides within this humble tool – a power that can shape the world of plumbing with its fiery touch.
Easy Steps to Remove Plumbers Putty and Achieve a Clean Surface
- Start by gently scraping off any excess plumber’s putty using a plastic putty knife or your fingers.
- Wet a cloth or sponge with warm soapy water and gently scrub the remaining putty residue.
- If the putty is still stubborn, try using a mixture of mineral spirits and paint thinners. Apply the mixture to the residue and let it sit for a few minutes before scrubbing it off.
- If the putty is hardened and difficult to remove, use a heat gun to soften it. Hold the heat gun a few inches away from the putty and move it back and forth until the putty becomes pliable. Then, carefully scrape it off with a putty knife.
- Repeat the process if there are any remaining traces of putty until the surface is clean.
- Dispose of the removed putty and cleaning materials properly.
- After removing the putty, clean the area with soapy water to remove any residue from the cleaning process.
- Finally, dry the area thoroughly before applying any new plumber’s putty or proceeding with the next step in your plumbing project.
5/11 What Solvents Can Dissolve/Clean Up Plumber’s Putty?
When it comes to removing plumber’s putty , there are a couple of solvents that can be helpful. One option is mineral spirits, which breaks down the putty and makes it easier to remove. However, it’s important to be cautious when using solvents.
Make sure to wear gloves and work in a well-ventilated area to avoid any health risks. Another safe and effective choice is soapy water. Simply mix a small amount of dish soap with warm water and apply it to the affected area.
Let it sit for a few minutes , then scrub away the putty with a soft brush or sponge. It’s important to remember that not all solvents are suitable for all surfaces. Always check the manufacturer’s instructions and test on a small area first to avoid any potential damage .
In conclusion, there are solvents like mineral spirits and soapy water that can effectively dissolve and clean up plumber’s putty. It’s always wise to take precautions and opt for environmentally friendly options whenever possible.

6/11 DIY Guide To Replacing Your Toilet
Embarking on the task of replacing a toilet may appear formidable, but fear not. With a reliable guide, it can become a gratifying DIY endeavor. Begin by eliminating the old toilet, bidding adieu to the plumber’s putty that once held it together.
Employ a putty knife or scraper to delicately scrape away the putty, ensuring the surface remains unharmed. Proceed to cleanse the area with soapy water or a solvent to obliterate any lingering residue. While employing solvents, exercise caution.
Familiarize yourself with and adhere to the instructions provided on the packaging. Don a pair of gloves and toil in a well-ventilated space. Abstain from direct contact between solvents and your eyes or skin, and distance them from open flames or sparks.
If you harbor reservations about utilizing solvents, there exist alternative approaches . One option involves gently heating the putty with a heat gun, followed by its removal with a putty knife or scraper. Alternatively, you may concoct a paste using equal parts baking soda and vinegar.
Apply this mixture to the putty, allow it to rest for a few minutes, and then proceed to remove the putty. By adhering to these steps and taking the necessary precautions, you shall triumphantly replace your toilet.

Looking to remove plumber’s putty? Check out this video tutorial on how to easily and effectively remove plumber’s putty from various surfaces.
7/11 How To Change A Tap Washer
Embarking on the task of replacing a tap washer may appear daunting at first glance, but fear not, for with a few simple steps and the appropriate tools at your disposal, this becomes an easily achievable DIY endeavor. Begin by delicately removing any remnants of plumber’s putty from the tap washer, employing the aid of a putty knife or scraper. Exercise caution to preserve the integrity of the surface.
To circumvent the most common blunders, it is imperative to first shut off the water supply. Locate and turn off the water valves positioned beneath the sink or at the main supply. Additionally, equip yourself with the essential instruments – a wrench or pliers to detach the tap handle and a trusty screwdriver to unscrew the tap assembly.
For this undertaking, ensure the presence of a wrench or pliers, a trusty screwdriver, and replacement washers, readily available for purchase at your local hardware store. Keep within reach a bucket or towel to capture any potential water leakage that may occur during the process. Adhere to these guidelines, evade any missteps, and employ the suitable tools to successfully replace the tap washer, thereby guaranteeing a leak-free tap.
Upon completion, do not forget to turn the water supply back on and meticulously inspect for any signs of leakage. May your plumbing endeavors be met with triumph and satisfaction!
8/11 DIY Tips to Keeping Your Pipes Flowing Smoothly
The Art of Plumbing Maintenance In the realm of plumbing, prevention reigns supreme. Here lie simple DIY solutions that will safeguard your pipes, sparing you the agony of costly repairs. Allow me to impart my wisdom and guide you on this noble quest.
One must be wary of the treacherous debris that plagues our pipes – hair, grease, and food particles. Fear not! Equip your sinks and showers with drain guards or strainers, humble devices that will intercept this menace before it wreaks havoc .
Should a minor clog dare to cross your path, wield the mighty plunger or the swift drain snake. These formidable tools, harnessed with your own hands, can often vanquish the blockage and salvage your wealth. But lo, regular maintenance is the true key to pipe prosperity.
Embark on a quest to inspect your pipes, seeking leaks and ensuring steadfast connections. And once a month, cleanse your drains with hot water and the elixir of vinegar. This holy ritual shall ward off the vile buildup and maintain the clarity of your pipes.
By heeding these noble DIY tips, you shall be spared the torment and depletion caused by the great plumbing calamities. Remember, dear reader, a touch of prevention shall pave the path to plumbing triumph.

9/11 How To Get Rid of Drain Flies
Pesky drain flies, those relentless creatures that haunt our homes, can be a true nuisance. Known by various names – sewer flies or moth flies – they thrive in the dark, damp corners of our kitchens and bathrooms. But fret not, for there are ways to bid them farewell and ensure they never return.
One approach is to turn to chemical treatments. Insecticides and drain cleaners specifically formulated to target these bothersome flies can be found. It is crucial, however, to meticulously adhere to the instructions and apply them in well-ventilated spaces.
For those inclined towards a more natural route, a blend of vinegar and dish soap may serve as a viable solution. Simply pour this concoction down the drain, allow it to settle for a few hours, and then flush it out with hot water. The vinegar works to break down organic matter, while the dish soap effectively suffocates the drain flies .
To prevent future infestations, it is essential to maintain clean drains by regularly flushing them with hot water and using a drain brush to eliminate any buildup. Be sure to check for leaks in pipes and faucets, as drain flies are drawn to moisture. Additionally, keeping the kitchen and bathroom areas clean and dry will discourage their lingering presence.
By employing these methods, experimenting with natural remedies, and adopting preventative measures, you can bid farewell to drain flies and revel in the bliss of a fly-free abode.

A Handy Guide: Understanding Plumbers Putty and How to Remove It
- Plumber’s putty is a versatile adhesive that is commonly used in plumbing projects.
- It is a pliable and moldable substance that is typically made from a combination of linseed oil, powdered limestone, and clays.
- Plumber’s putty is used to create watertight seals around drains, faucets, and other plumbing fixtures.
- One of the main advantages of plumber’s putty is its ability to remain flexible even after it has dried, allowing for easy removal if necessary.
10/11 How To Remove Your Bathtub Drain (DIY)
Say goodbye to your bathtub drain woes with this simple and cost-effective DIY project. Here’s what you’ll need:
1. Necessary Tools: – Screwdriver (flathead or Phillips) – Drain removal tool – Pliers Now, let’s dive into the steps:
1. Begin by locating and carefully removing the screws that secure the drain cover.
2. Insert the drain removal tool and gently twist it counterclockwise to loosen the drain body.
3. Utilize the pliers to unscrew the drain body from the drain pipe.
4. With finesse, lift out the drain body and bid farewell to your old drain. Remember to take the following precautions: – Handle with care to prevent any unintended damage. – Exercise caution if you have previously used chemical drain cleaners.
By following these instructions and taking the necessary precautions, you can confidently tackle the task of removing your bathtub drain.
11/11 How To Unblock A Drain Pipe Outside
In the realm of outdoor plumbing, the presence of a blocked drain pipe can wreak havoc on your serene oasis. But fear not, for there are telltale signs that can guide you towards resolution. Keep an eye out for standing water or pooling, a clear indication of a formidable blockage .
Should an unpleasant odor assail your senses, it may be a sign of stagnant water and debris accumulation. And if the gentle symphony of gurgling sounds and slow drainage permeates through connected fixtures, you can be certain that a blockage has taken hold. To combat this plumbing predicament, arm yourself with the necessary tools.
Begin your quest with a plunger specifically crafted for outdoor drains. Employ its suction powers to dislodge the obstruction, repeating the ritual as necessary. Should the blockage prove obstinate, a drain snake or auger can be summoned to break its stranglehold.
Finally, let loose a garden hose wielding a high-pressure nozzle to flush away any remnants of the blockade. Embark on this endeavor with the following playbook in hand:
1. Don your protective gloves and eyewear, ensuring your safety before all else.
2. Employ a gloved hand or brush to rid the drain opening of any debris that may impede progress.
3. Wield the plunger with conviction, creating a suction force that will dislodge the obstruction. Repeat this ritual until victory is achieved.
4. Should the blockage persist in its defiance, introduce a drain snake or auger into the pipe, rotating it in a clockwise motion to shatter the clog’s resolve.
5. Once the path is cleared, join forces with a garden hose equipped with a high-pressure nozzle.
6. Gently guide the hose into the drain pipe and unleash the full force of water. Allow it to flow freely for several minutes, purging any lingering debris from its dominion.
7. Remove the hose and gaze upon the fruits of your labor. If the water now dances with grace and harmony, rejoice in your triumph. If, by some cruel twist of fate, the blockage remains, do not despair.
Seek the aid of a professional or repeat the process with renewed vigor. By adhering to these sacred steps and wielding the tools of the trade, you shall restore order to the realm of your outdoor sanctuary. Remember, safety is paramount, and if uncertainty or tenacious blockages persist, do not hesitate to summon the aid of a professional.

CONCLUSION
In conclusion, understanding how to remove plumber’s putty is essential for maintaining and repairing plumbing fixtures. This article has provided a comprehensive guide on different methods of removal, including using bare hands, a knife or utility blade, soapy water, mineral spirits and paint thinners, and even a heat gun. By following these step-by-step instructions, readers can confidently tackle the task of removing plumber’s putty without causing any damage.
This article aligns perfectly with the search intent of the keyword “how to remove plumber’s putty,” as it provides a thorough explanation of the process and offers various solutions. For readers interested in further DIY plumbing guides, we recommend exploring our other articles on topics such as replacing a toilet, changing a tap washer, maintaining pipe flow, getting rid of drain flies, removing a bathtub drain, and unblocking an outdoor drain pipe.
FAQ
Should you remove excess plumbers putty?
Plumbers putty is a type of putty that does not require curing. Unlike other types of putty, it should not shrink, crack, or harden over time. This means that you can safely use your sink right away without waiting for the putty to set. Simply remove any excess putty that squeezes out during the application process.